A simple border can turn a single quilt block into something finished. Frame a block and it's suddenly a pillow front, a mini quilt or a placemat. Add borders to a stack of mismatched orphan blocks and they become the same size, ready to sew into a sampler.
The good news is that adding a border is one of the easiest skills in quilting. You cut four strips, sew two on, then sew the other two on. The trick is in the measuring, and that's what this tutorial is all about.
Below I'll walk you through adding a 2" border to a 12" nine patch block, step by step with photos. You'll also find a cutting chart for other block sizes, a cornerstone variation and fixes for the most common border problems. If you're still deciding what kind of border to use, browse our quilt border ideas for inspiration first.
What’s In This Post:
- Why Add a Border to a Quilt Block?
- The Quick Cutting Formula
- What You'll Need
- How to Add a Border to a Quilt Block, Step by Step
- Variation: Add Cornerstones
- Variation: Mitered Corners
- Adding More Than One Border
- How Much Fabric Do You Need for One Block?
- Troubleshooting Common Border Problems
- Quilt Block Border FAQs
- Final Thoughts
Why Add a Border to a Quilt Block?
A border around one block is useful in more ways than you might think:
- Make a small project. A bordered 12" block makes a 16" pillow front. Turn it into a quilted pillow cover, a mini quilt for the wall, a table topper or a placemat.
- Rescue orphan blocks. Leftover blocks from old projects rarely match in size. Add borders cut a little wide, then trim every block to the same size.
- Make blocks bigger. An 8" block with a 2" border becomes a 12" block, so it can join a quilt of 12" blocks.
- Float a block. A border in the same fabric as your background makes the design look like it's floating, which is a popular look in modern quilts.
- Practice for a whole quilt. Adding borders to a quilt top works exactly the same way, just with longer strips.
The Quick Cutting Formula
Here's all the math you need. Work with your block's finished size (the size it will be once it's sewn into something) and the finished border width you want.
- Strip width: finished border width + ½"
- Side strips (cut 2): finished block size + ½" long
- Top and bottom strips (cut 2): finished block size + 2 border widths + ½" long
For our example, a 12" finished block (12½" unfinished) with a 2" finished border:
- Strip width: 2" + ½" = 2½"
- Side strips: 12" + ½" = 12½"
- Top and bottom strips: 12" + 2" + 2" + ½" = 16½"
The bordered block will measure 16½" unfinished and 16" finished.
Border Cutting Chart for Common Block Sizes
| Finished block | Finished border | Cut strip width | Side strips (cut 2) | Top and bottom strips (cut 2) | Bordered block (unfinished) |
|---|---|---|---|---|---|
| 6" | 1½" | 2" | 6½" | 9½" | 9½" |
| 8" | 2" | 2½" | 8½" | 12½" | 12½" |
| 10" | 2" | 2½" | 10½" | 14½" | 14½" |
| 12" | 2" | 2½" | 12½" | 16½" | 16½" |
| 12" | 3" | 3½" | 12½" | 18½" | 18½" |
These are the sizes for a perfect block. Real blocks are often off by an eighth of an inch or so, which is why the steps below have you measure your own block before you cut. For a whole quilt top, our quilt border calculator does the math and tells you how much fabric to buy.
What You'll Need
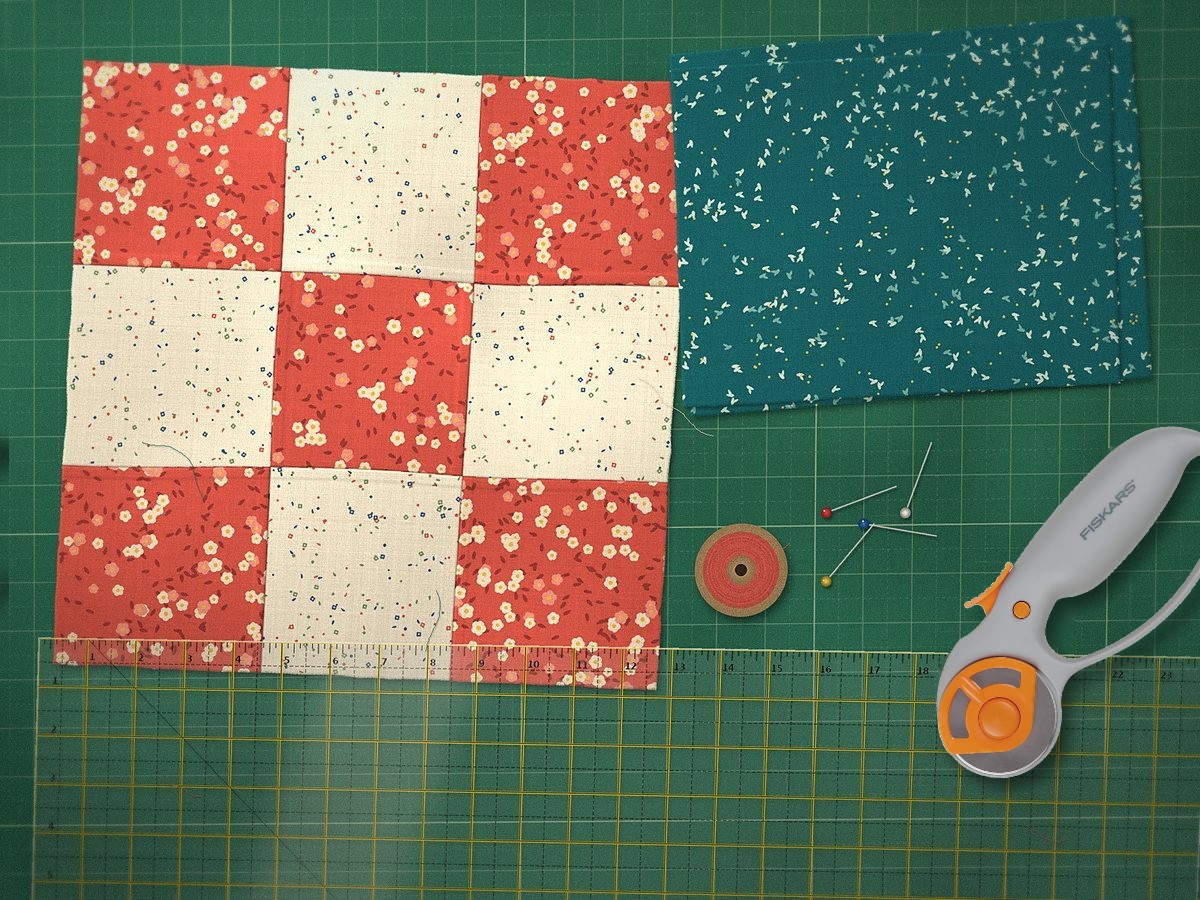
- A finished quilt block (mine is a 12" nine patch, so it measures 12½" before it's sewn into anything)
- Border fabric: a fat quarter or ¼ yard is plenty for one 12" block
- A quilting ruler, ideally 6½" x 24" for cutting strips, plus a square ruler if you have one
- A rotary cutter and self-healing cutting mat
- Sewing machine with a ¼" foot, and thread in a neutral color
- Pins or sewing clips
- An iron and ironing board
Use 100% quilting cotton for the border if you can. It presses crisply and won't stretch as much as lighter fabrics.
How to Add a Border to a Quilt Block, Step by Step
Step 1: Square Up the Block
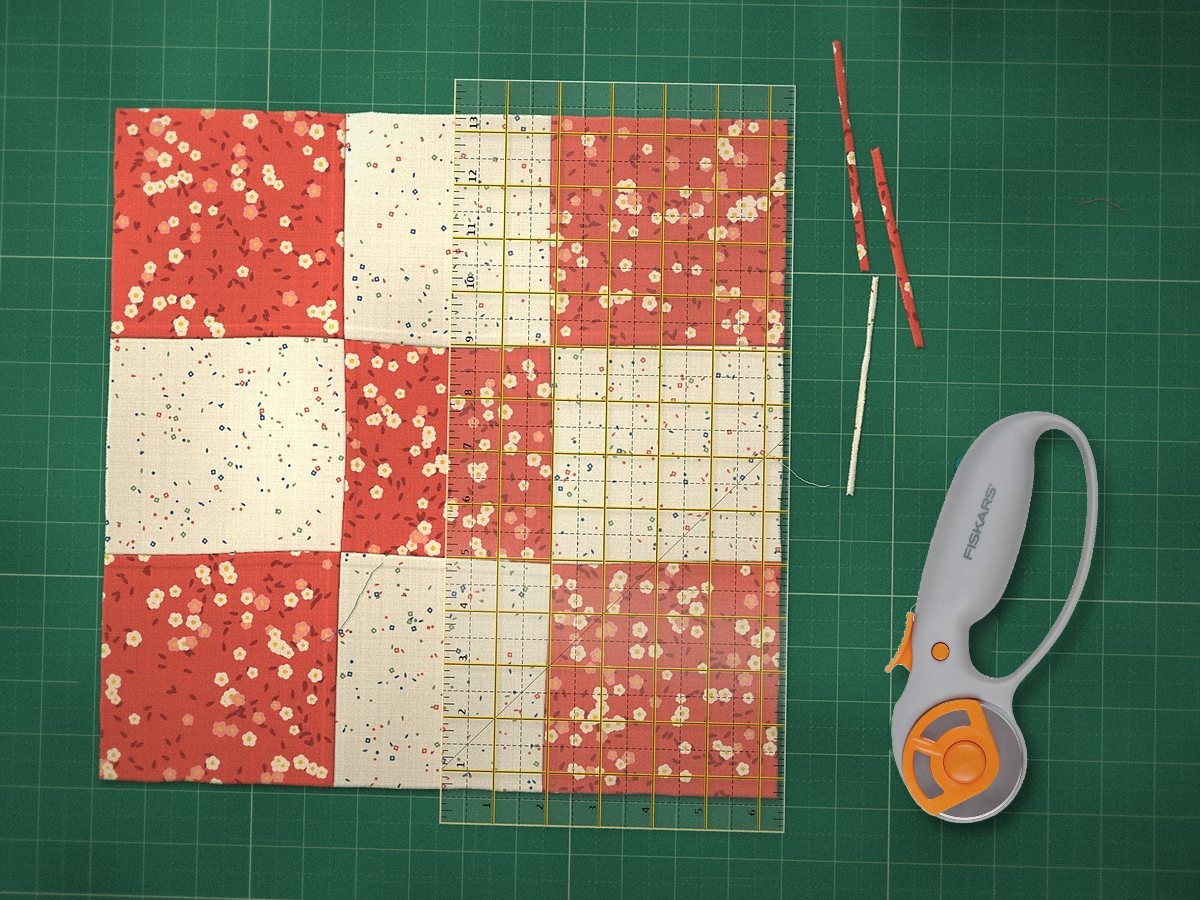
Press your block well, then lay it on your cutting mat. Before you add anything, make sure it's square with straight edges.
Line up a ruler line with a seam that runs across the block, then trim off any uneven bits along the edge. For a block with a 12" finished size, trim it to exactly 12½" square, keeping ¼" of seam allowance beyond the points of any seams that meet the edge.
Only take off a sliver. If a block is too small to trim to its target size, don't cut it down further. Just work with the size it is and measure carefully in the next step. Our guide to squaring up a quilt has more tips that work for blocks too.
Step 2: Measure Through the Center
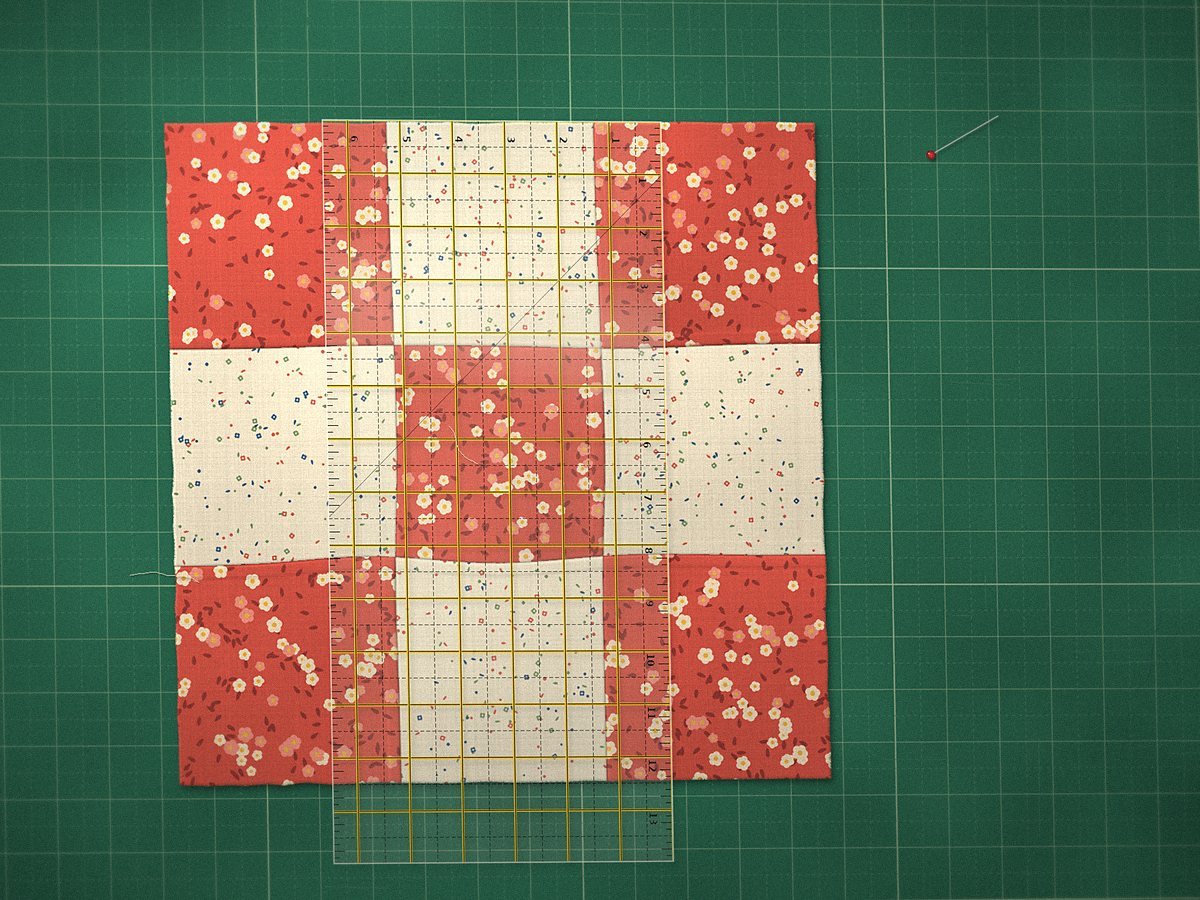
This is the step most beginners skip, and it's the secret to borders that lie flat.
Measure your block from top to bottom through the center, not along the edges. Edges stretch as you handle and press a block, so they're often a little longer than the middle. If you cut border strips to match a stretched edge, the stretch gets sewn in and the border will ripple.
My block measures 12½" through the center, so my side strips will be 12½" long. If yours measures 12⅜", cut your strips 12⅜". Always go with your actual measurement.
Step 3: Cut the Border Strips
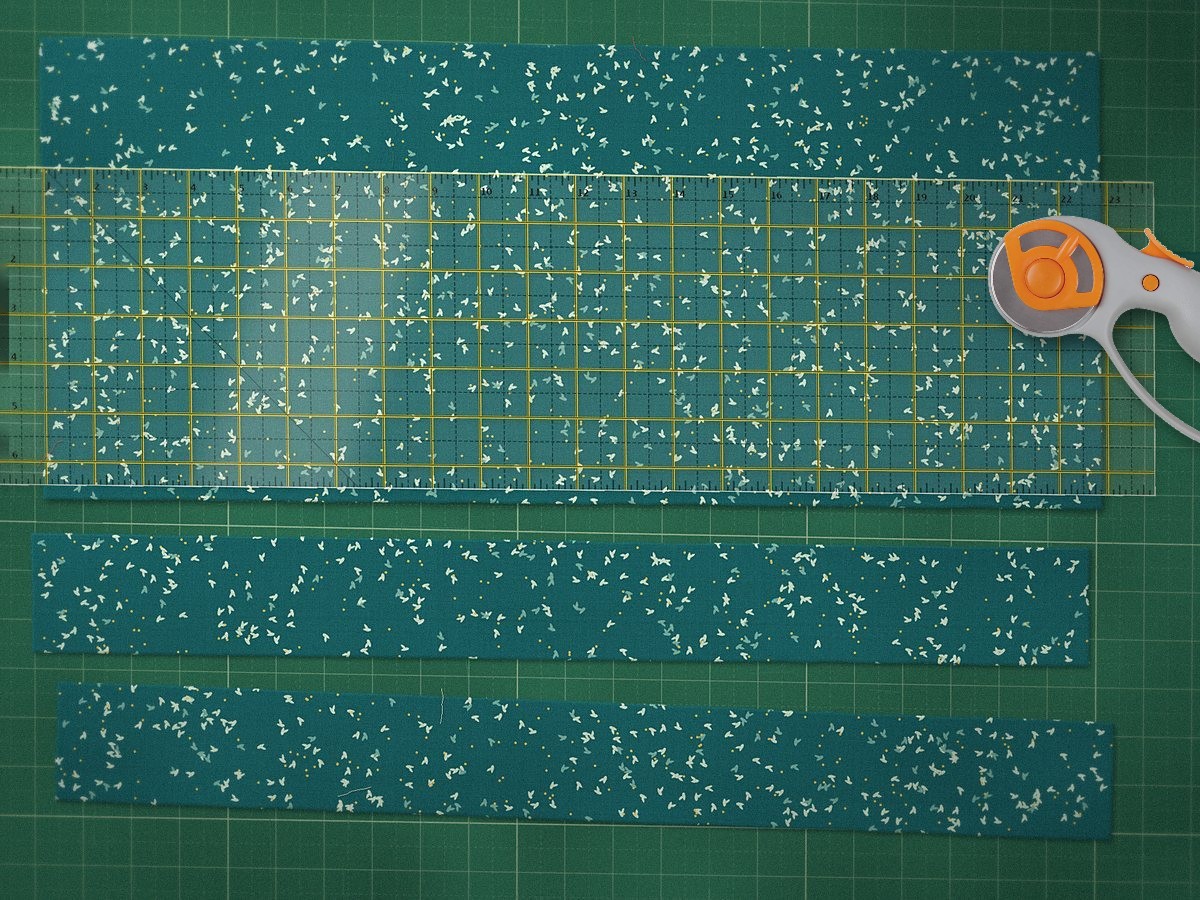
Fold your border fabric with the selvages together and square up one cut edge. Then cut strips at your strip width. For a 2" finished border, that's 2½".
From the strips, cut:
- 2 side strips at the length you just measured (12½" for my block)
- 2 top and bottom strips a little longer than you think you'll need, about 17". You'll trim these to an exact length in Step 6.
Cut your strips on the lengthwise or crosswise grain, never on the bias. Bias strips stretch and are almost impossible to keep flat. If your fabric has a directional print, like trees or words, cut the top and bottom strips so the print runs the same way as on the side strips once they're sewn on.
Step 4: Pin the Side Strips
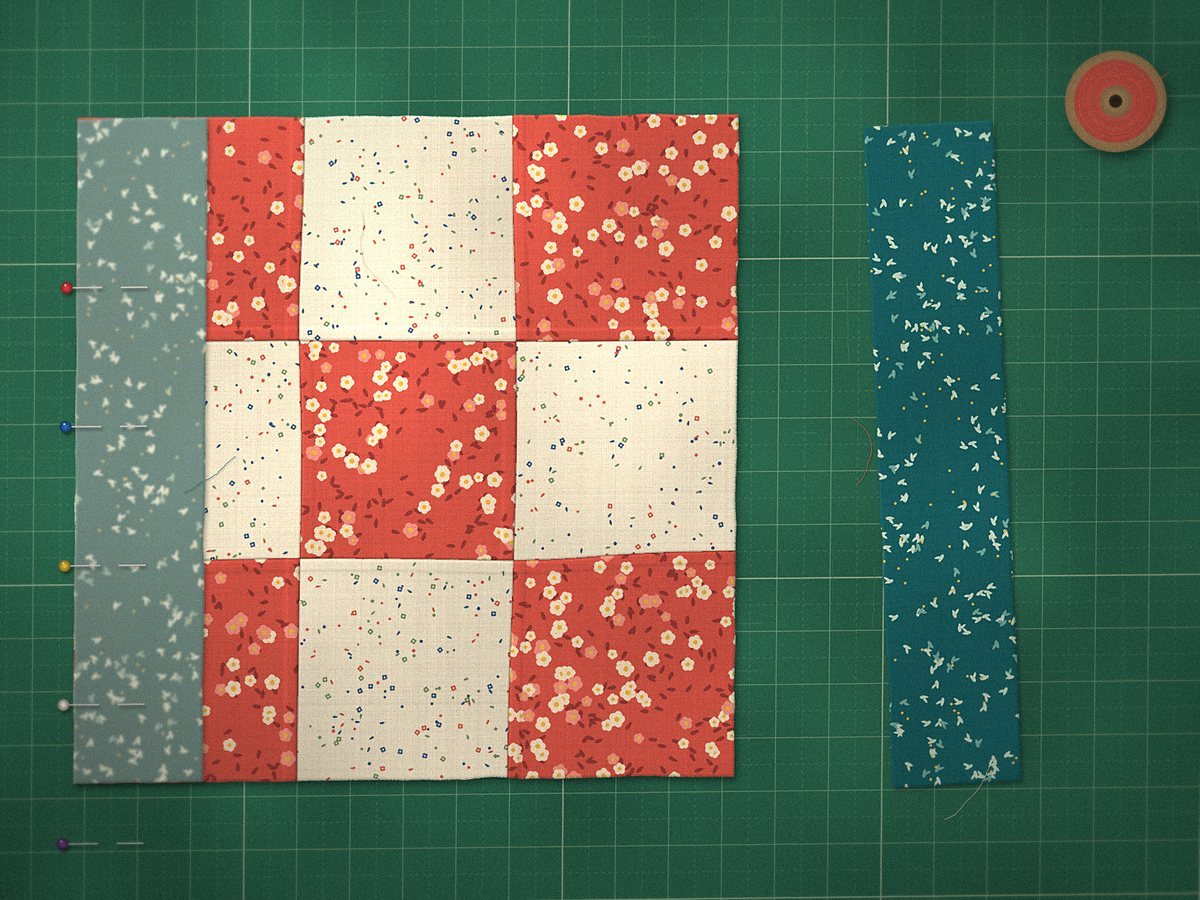
Place one side strip on the block with right sides together, lining up the raw edges. Pin the two ends first, then the center, then add a pin every 2" to 3" in between. Put the pins in perpendicular to the edge with the heads hanging off so you can pull them out easily as you sew.
If the block and strip are slightly different lengths, pinning the ends and middle first lets you spread out (ease in) the difference evenly instead of ending up with a lip at the bottom.
Step 5: Sew and Press the Side Strips
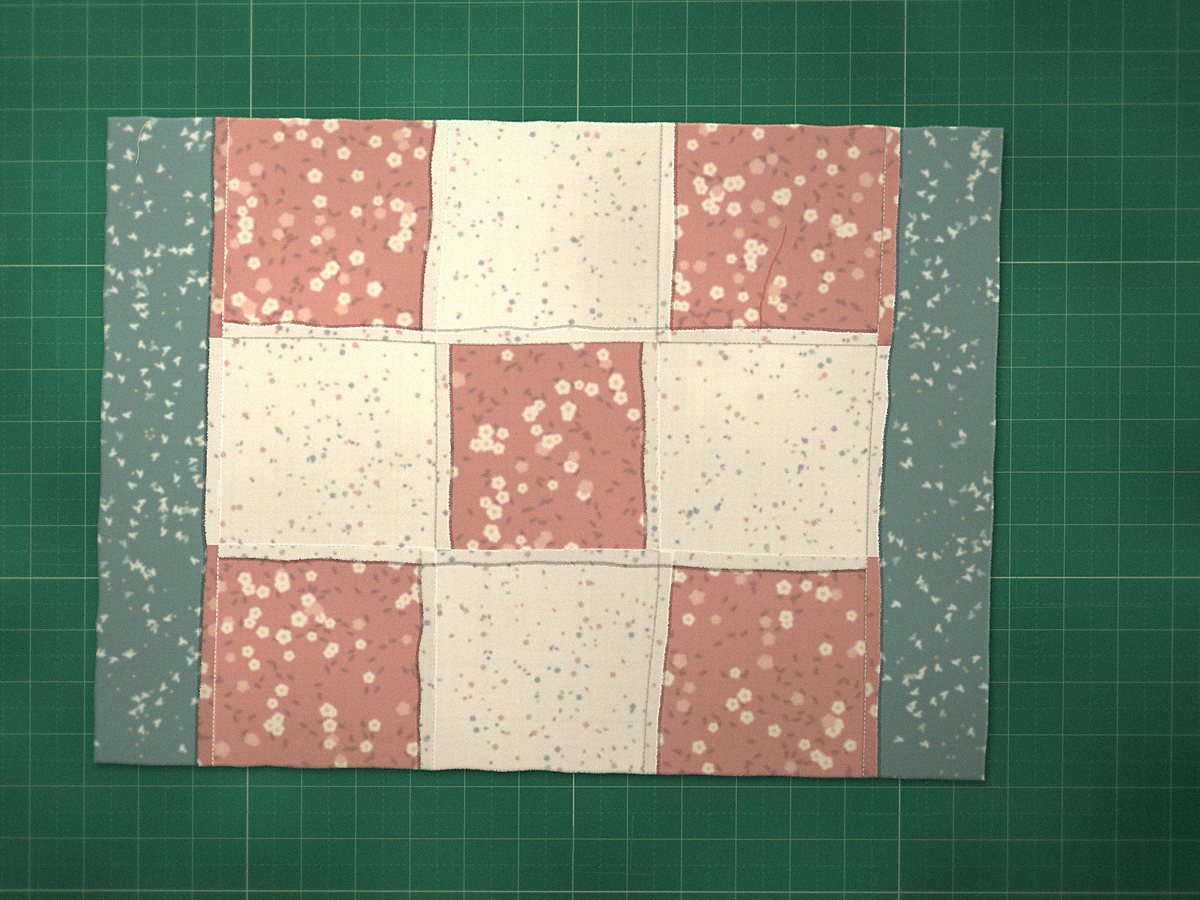
Sew the strip on with a ¼" seam. Sew with the block on top so you can see its seam allowances and keep them lying flat as they go under the presser foot. Repeat for the strip on the opposite side.
Press the seams toward the border. Set the seam first by pressing it flat as sewn, then open the strip and press from the front so there are no little pleats along the seam line. Pressing toward the border makes it lie flat and gives you a nice ridge to stitch in the ditch later. If your border is lighter than the block and the seam allowance shows through, you can press the seams open instead.
You can see in the photo how the seam allowances on the back of my block lie toward the teal border.
Step 6: Add the Top and Bottom Strips
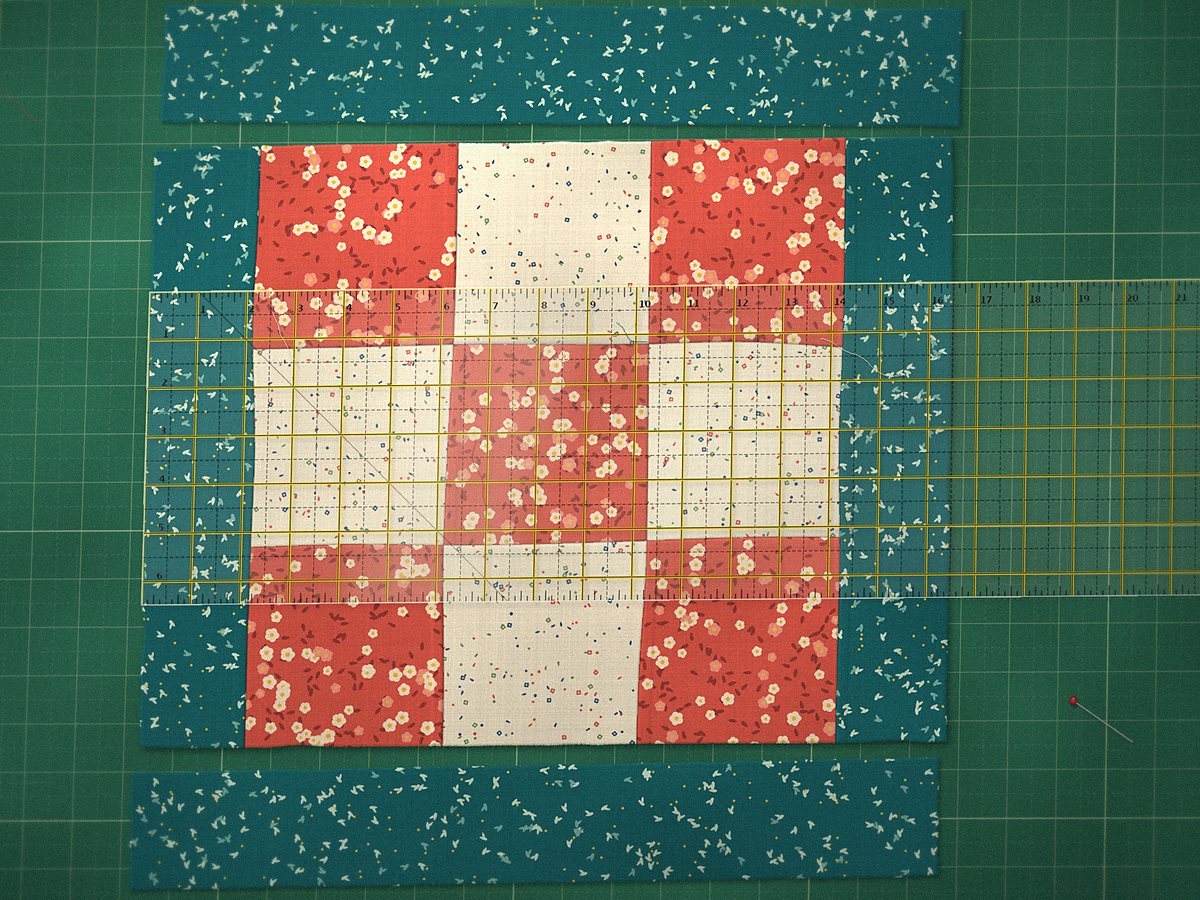
Now measure your block again, this time from side to side through the center, including the side borders you just added. For my block it's 16½" (12½" + 2½" + 2½" - two ½" seam allowances).
Trim the top and bottom strips to that length. Pin them to the top and bottom edges just like before (ends, center, then in between), sew with a ¼" seam and press toward the border.
Step 7: Press and Square Up
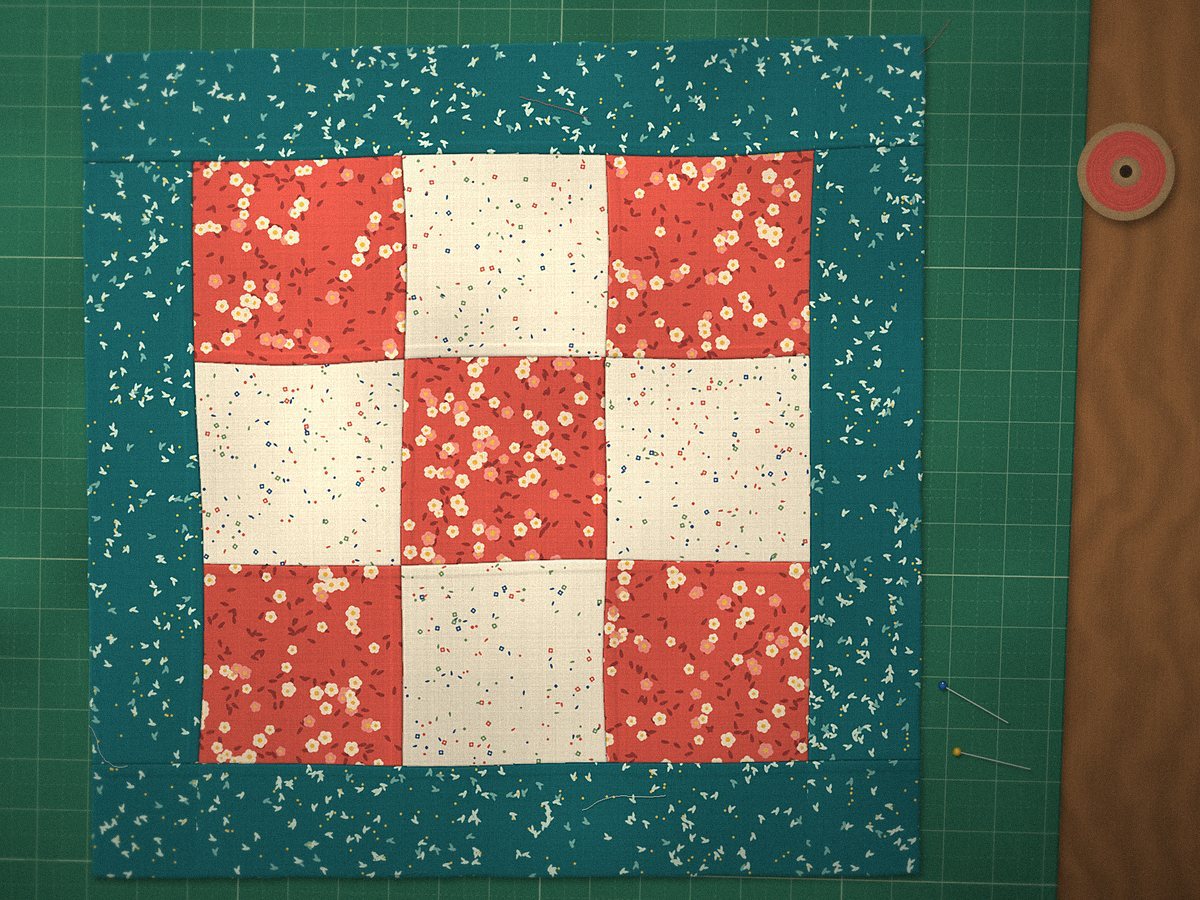
Give the whole block a final press from the front. Then lay it on your mat and check that it's square. Use the seams where the borders meet the block as your guide: the distance from each seam to the outside edge should be 2¼" all the way around (the 2" border plus ¼" seam allowance).
Trim any slivers to straighten the edges and you're done. My bordered block measures 16½" square, so it finishes at 16".
Variation: Add Cornerstones
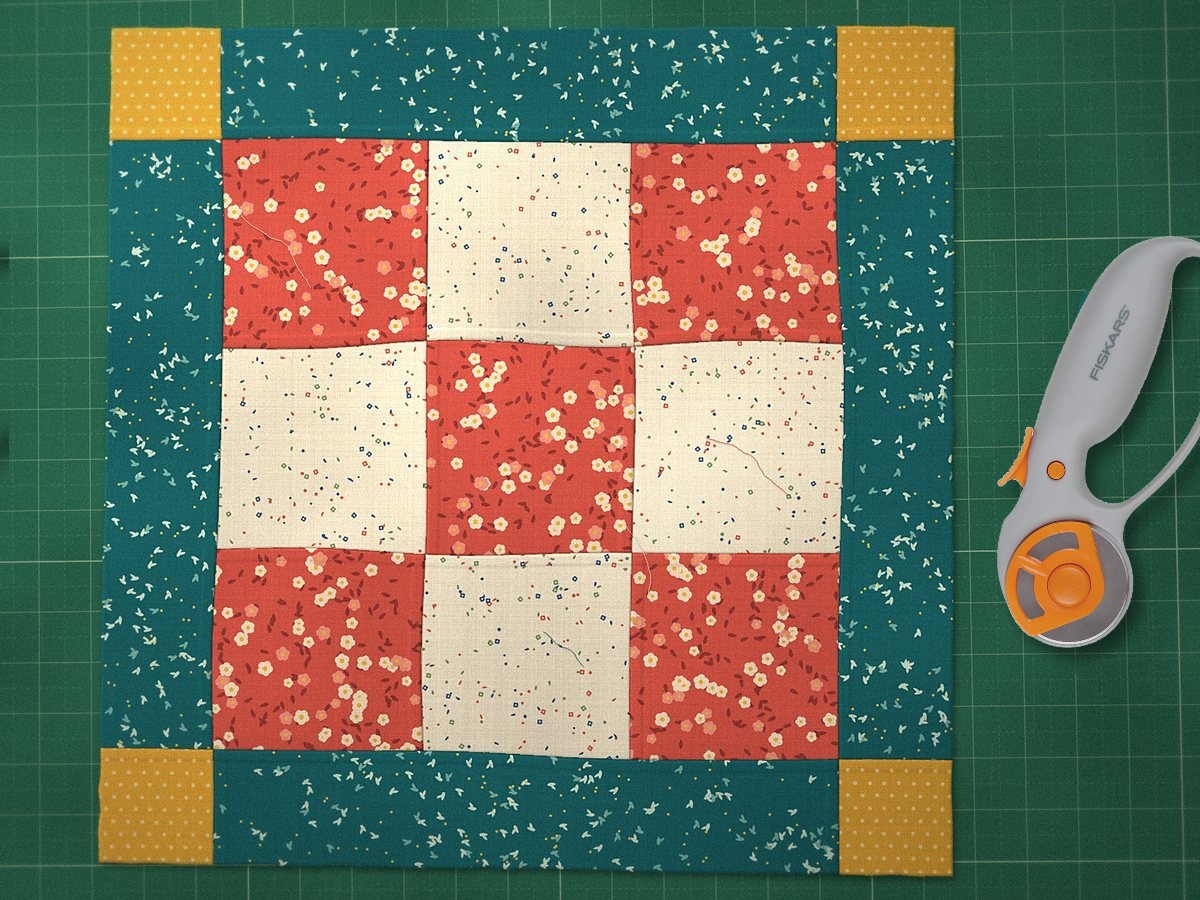
Cornerstones are small squares in a contrasting fabric that sit in each corner of the border. They add a pop of color and make the border look pieced on purpose.
For a 12" finished block with a 2" border and cornerstones, cut:
- 4 border strips 2½" x 12½" (all four are the same length)
- 4 cornerstones 2½" x 2½"
Then:
- Sew a border strip to each side of the block and press toward the border, just like Steps 4 and 5.
- Sew a cornerstone to each end of the remaining two strips. Press these seams toward the border strip, not the cornerstone. Each unit should measure 16½" long.
- Sew the units to the top and bottom of the block, matching the cornerstone seams to the side border seams. Because the seams are pressed in opposite directions, they nest together and the corners line up neatly.
Variation: Mitered Corners
For a border that looks like a picture frame, you can miter the corners so the strips meet at a 45 degree angle. This looks especially nice with striped fabric. Mitering takes a little more fabric and a little more patience, and we cover it step by step in our tutorial on how to miter corners on a quilt.
Adding More Than One Border
To add a second border, simply repeat Steps 2 through 7 using your bordered block as the new center. Measure, cut, sew the sides, measure again, then sew the top and bottom.
A narrow inner border (often 1") and a wider outer border makes a block look framed and polished. As a rule of thumb, borders of different widths look better together than two borders of the same width.
How Much Fabric Do You Need for One Block?
For a 12" block with a 2" border you need 58" of 2½" strips (two at 12½" and two at 16½"):
- From yardage: Two 2½" strips cut across the width of fabric (selvage to selvage) are enough. Cut both 16½" pieces from one strip and both 12½" pieces from the other. That's just 5" of fabric, so a ¼ yard cut is plenty.
- From a fat quarter: Cut four 2½" x 21" strips along the long side. Each one is long enough for one border piece, and you'll still have about 8" of fabric left over.
Troubleshooting Common Border Problems
My border is wavy. The strips were cut longer than the block, usually because they were measured along a stretched edge. Unpick the border, measure through the center, cut new strips to that length and pin carefully to ease in the fullness.
My block is cupped or puckered in the middle. The opposite problem: the border strips were too short and pulled the block in. Re-cut them to your center measurement.
My strip came up short at the end of the seam. One layer stretched as you sewed. Pinning the ends and center first prevents this. A walking foot also helps if your machine has one.
My block isn't square after the borders are on. Measure both diagonals. If they're within ¼" of each other, a light trim will fix it. If not, the side strips were probably different lengths, so check them against each other before you sew next time.
My corners don't meet neatly. Make sure you're sewing a true ¼" seam. Sew a test seam on scraps and measure it. Even a slightly wide seam adds up across several seams.
Quilt Block Border FAQs
Should I press border seams open or toward the border?
Most quilters press border seams toward the border. It helps the border lie flat and makes quilting in the ditch easier. Press seams open only if a dark seam allowance would show through a light border, or if the block itself has a lot of bulky seams at the edge.
Which borders do you sew on first?
It doesn't matter much, but it's traditional to sew the side borders first, then the top and bottom. Whichever you choose, do the same on every block in a project so they all look alike.
How wide should the border on a quilt block be?
For a single block, a border between one sixth and one quarter of the block size usually looks balanced. That's 2" to 3" on a 12" block. Wider borders work well when you want a bigger project, like a 20" pillow from a 12" block (a 4" border). Our quilt border ideas post has more on choosing border widths and styles.
What's the difference between a border and sashing?
A border goes around the outside of a block or quilt. Sashing is the strips that go between blocks to separate them. Many quilts use both. See our tutorial on how to sash a quilt to learn how sashing is added.
Can I use this method on a whole quilt?
Yes. Adding a border to a quilt top is exactly the same: measure through the center, cut the side borders, sew them on, measure again and add the top and bottom. Strips longer than your fabric's width will need to be joined end to end first. Once the borders are on, you're ready to quilt and bind your quilt.
Final Thoughts
Adding a border to a quilt block comes down to three habits: square up first, measure through the center and pin the ends before the middle. Do those and your borders will come out flat and square every time.
Start with one block and a plain border. Once you've got the hang of it, try cornerstones, a double border or mitered corners to give your blocks a whole new look.