Straight-line quilting is a popular choice for modern quilters, but what do you do if you want to use straight lines but add a little more pizazz to your quilting design?
Enter the fabulous grid quilt.
You may be wondering what a grid quilt is, and don’t worry; we will explain precisely what it is and show you some outstanding examples of them.
Also, you can check out some handy templates to create these geometric marvels on your next quilting projects.
What Is Grid Quilting?
Grid quilting is a fun, unique way to add texture and a design layer to your quilts using straight-line quilting techniques. There are many ways to achieve and use this quilting style on your quilts.
You use straight lines to create geometric shapes on your quilts.
You can use a quilt grid template to achieve these lines or draw them on using a straight edge and a marking tool such as a hera marker or chalk pencil.
You can use these designs as an allover motif on the entire quilt top, or you can use them to elevate specific blocks or pieces you want to showcase. Either way, grid quilting gives a beautiful modern twist to any quilt top and is surprisingly easy to achieve, even for beginners.
How Do You Use A Quilters' Grid?
The easiest way for a beginner to do grid quilting is by using a quilter’s grid stencil.
There are hundreds of stencils to choose from, and you can use the following instructions with any stencil.
- Step 1: Decide where you want to use the grid.
Before you make any marks on your quilt, decide whether you want to do an allover design or if you want to focus the grid quilting on specific blocks.
- Step 2: Mark your grid onto your quilt top.
The great thing about marking your quilt before you do any quilting is that you will see what the design will look like before you stitch any stitches.
As I mentioned earlier, you can use any type of marking tool that you want to use. Here are a few marking tool options to consider.
- Hera Marker
- Chalk Pencil
- Erasable Heat Pen
- Water Soluble Ink Pen
- Pouce Pad and Chalk
No matter what marker you choose, ensure it is NOT permanent. If you are using ink, I recommend doing a test with scrap fabric before you mark your finished quilt top.
- Step 3: Stitch the grid quilting
Once you have your quilting design marked on your quilt top, you can start quilting. I highly recommend using a walking foot if you are doing straight lines. A walking foot will help feed the fabric evening through the machine.
You can also use a walking foot with curvy designs if you take it slow and adjust the quilt under the needle when needed.
7 Grid Quilting Ideas to Try
Now, let’s look at some beautiful examples of what is possible using grid quilting. All of these quilting grids are beginner-friendly and will be fun.
1. Triple Diagonal Lines
Here is a fun option if you like the look of diagonal straight lines but want something a little extra. This simple tutorial shows you exactly how to do with the type of grid quilting. This is perfect for an all-over grid design.
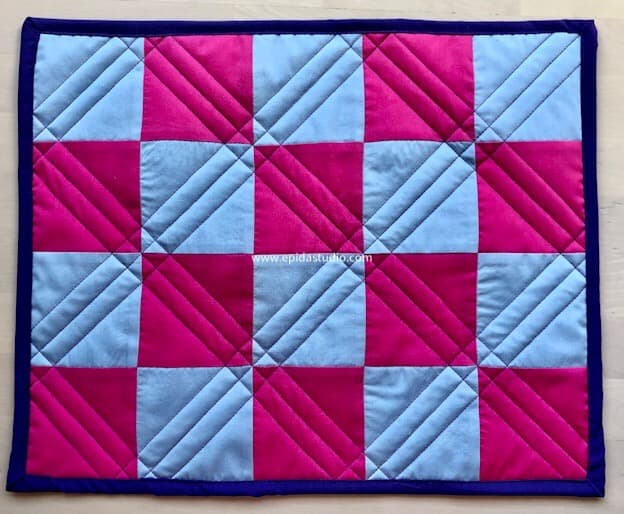
2. Simple Square Grid
This popular straight-line quilting design uses diagonal lines from the left and right of the quilt top to create an on-point checkerboard motif. This is a great free tutorial from Lo & Behold Stitchery, and she shows us how she created this design step-by-step.
You can use this as inspiration to create any size of checkerboard squares you want on your quilt project.
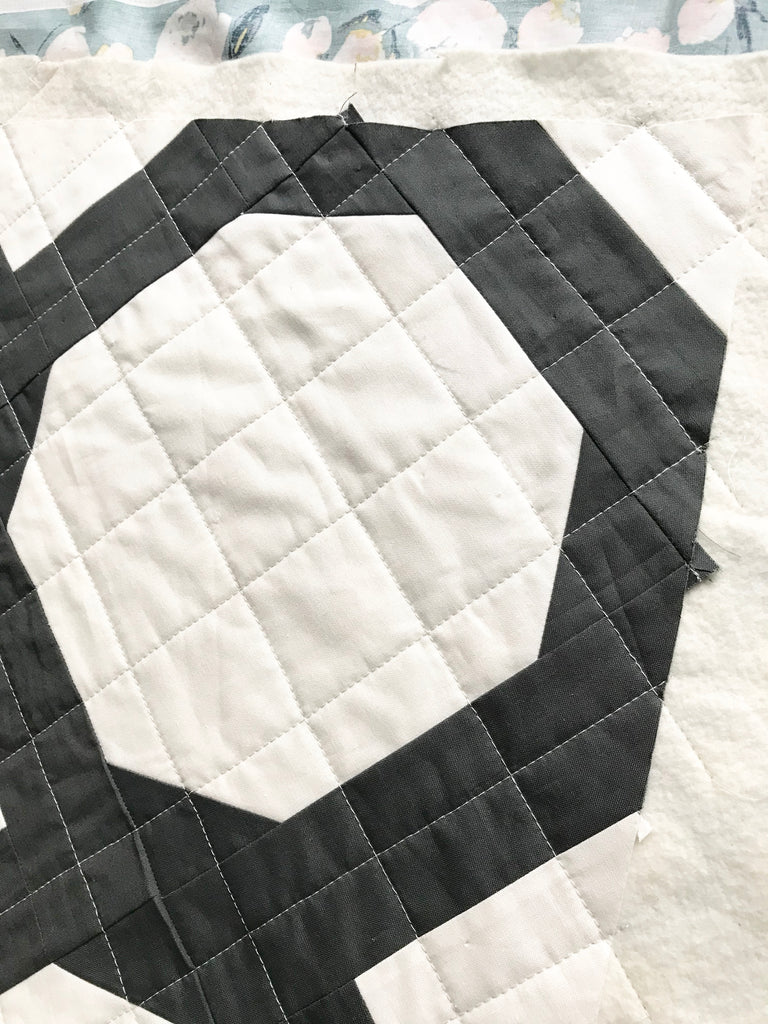
3. Squares
Squares are another excellent choice for an all-over design or a block filler. This design can be done in any size square and has a clean, modern vibe. You could even use this design on a border to add texture.
4. 60° Triangles (Diamonds)

This is a fun twist to regular diagonal quilting and is just as easy to accomplish. To create this pattern, you must sew all the diagonal lines on one side of the quilt. Then take a ruler and use the 60° mark to mark the diagonal lines from the opposite side.
5. Curvy Lines
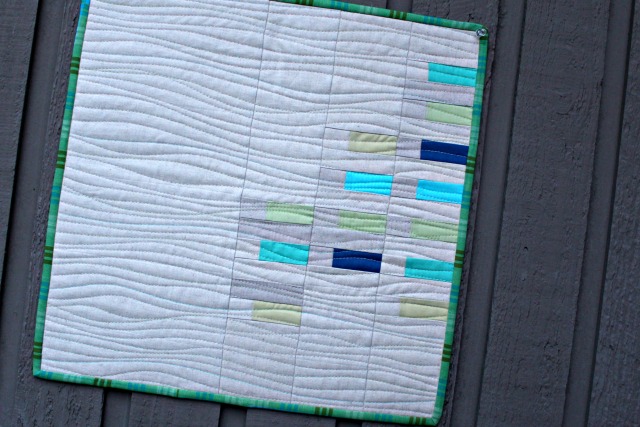
You can create these beautiful curvy lines with a quilting grid or organically with your walking foot. You can follow this tutorial to make curvy lines on your quilt. This is a fun choice you can use for water, sky, or movement for your quilt design.
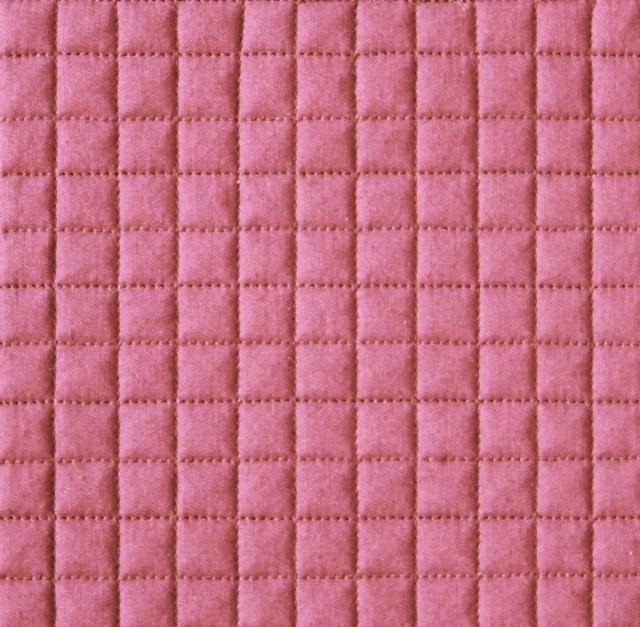
6. Matchstick Quilting
Matchstick quilting refers to the closeness of the quilting lines since they create thin lines across the quilt.
To create this quilting design, you need to have your straight lines ⅛” approximately. You can have the gaps vary a bit like the above picture, or have the gaps be exact for a cleaner look.
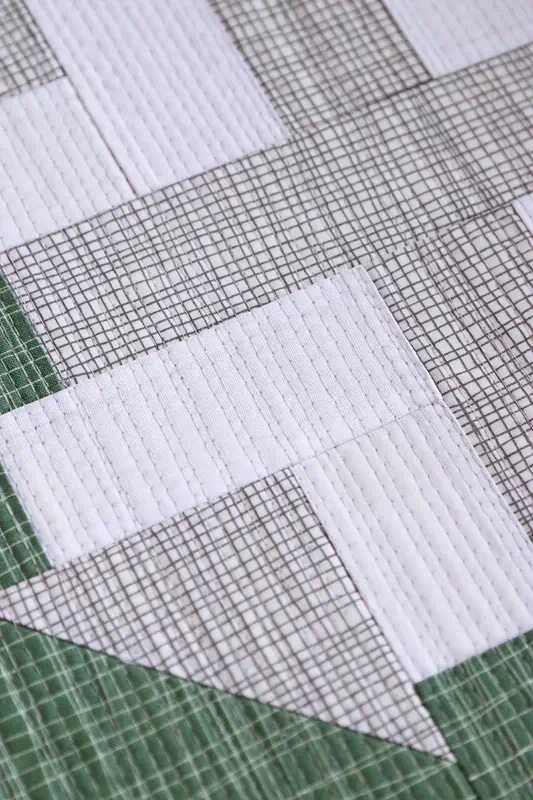
7. Thatched Straight Lines
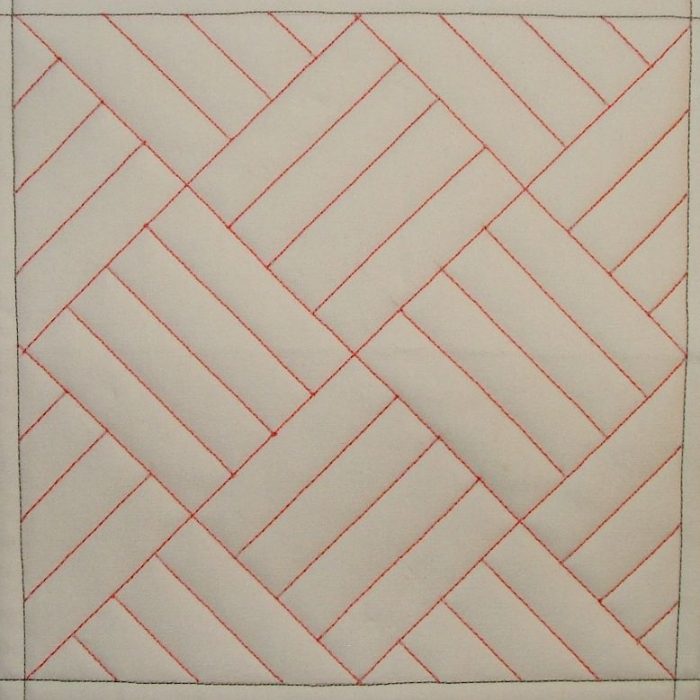
Isn’t this an excellent design? This tutorial is on creating this seemingly complex design; however, it is much simpler than you may think. The trick is to figure out the grid before you start quilting.
More Related Articles
Spark Your Creativity With These 19 Machine Embroidery Designs For Quilting
15 Deliriously Beautiful Drunkards Path Quilt Patterns
19 Easy And Exquisite Charm Pack Quilt Patterns
9 Grid Stencils You Should Try
Now that you’ve seen several gorgeous examples of what you can create using quilting grids, let’s check out some grid stencils you can purchase.
The great thing about these stencils is they are relatively cheap, but the designs you can create with them are SO impressive. They’re worth the price, plus they’re reusable.
1. 2” Grid
Here is a fun grid design that features 2” squares. This is a large 17” x 17” stencil that you can use for all kinds of quilting projects. You can use this for an all-over design, or you could use it in a single block.
These stencils can be mixed and matched with other stencils to create unique designs as well. This grid stencil is made in the USA and is reusable.
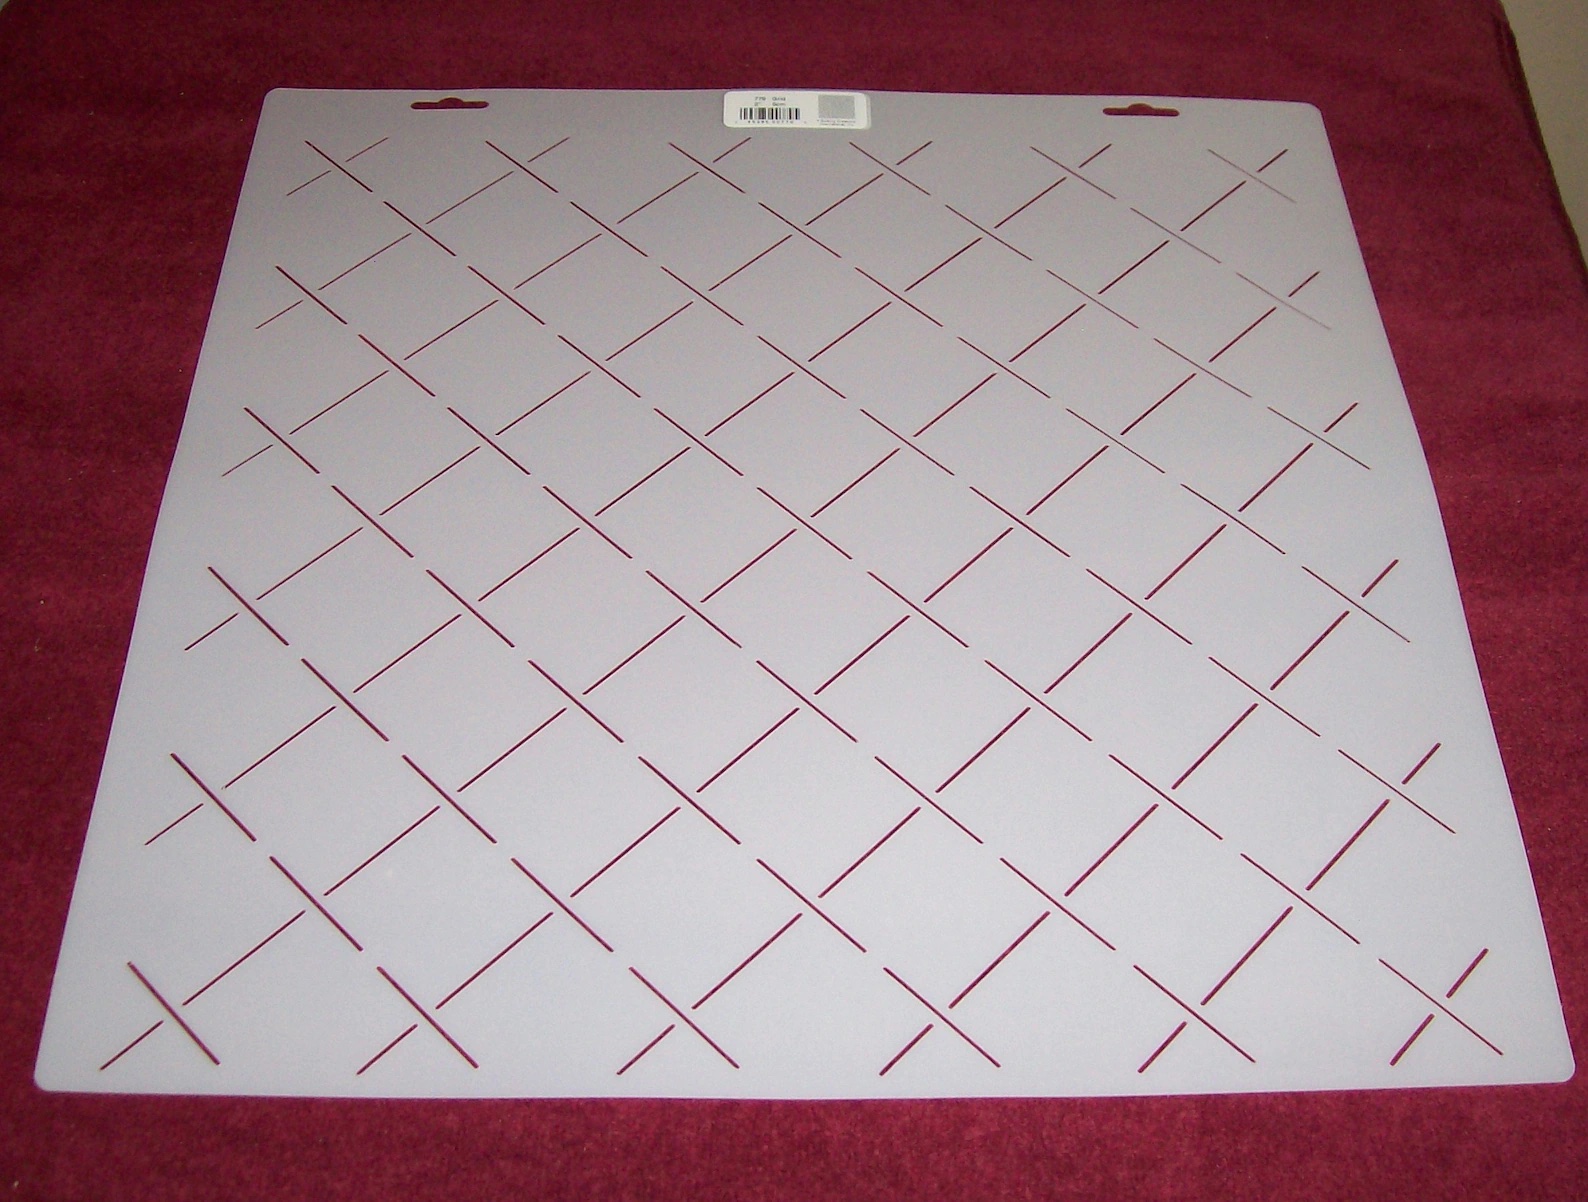
2. Diamond Grid

Here is the perfect stencil if you prefer a diamond motif over a square. This large 17” x 17” stencil can be used for a gorgeous angular all-over design or as an excellent filler design for particular blocks.
You can use this stencil with domestic machines, longarm machines, or for hand quilting. Made in the USA, it is easy to clean and reusable.
3. Large Single Fan
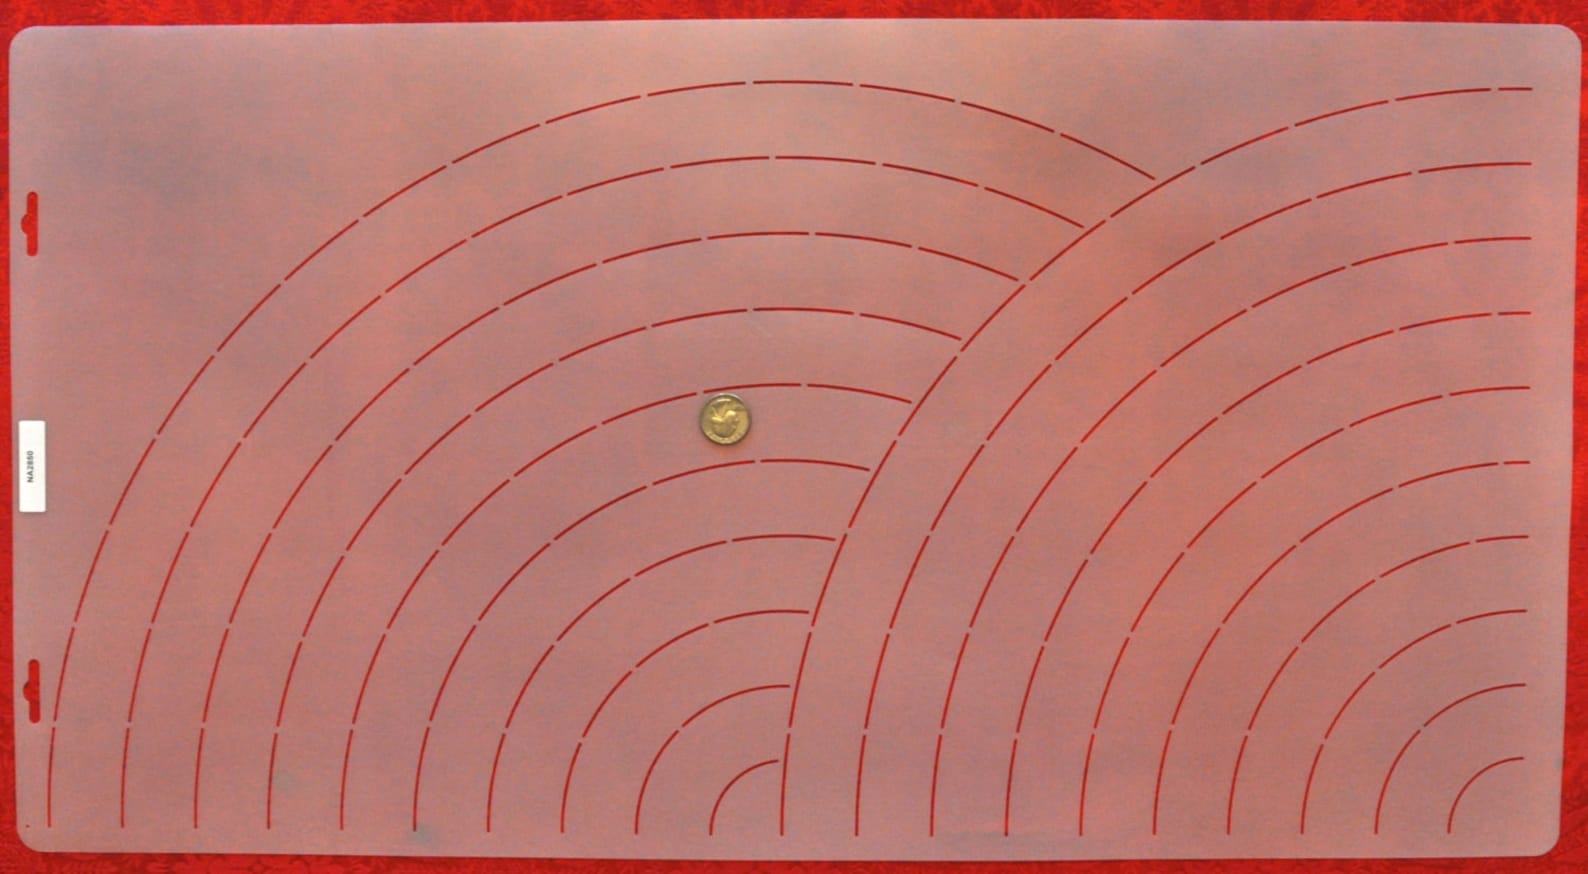
Here is an excellent example of a quilting grid that you can use with a walking foot, even though it is curved. A quilt finished with this design over the entire quilt top is stunning, and you can do it! This stencil measures 16” x 30”, so this fan design is quite large.
The seller also includes a tutorial on using this stencil type for quilting. This design adds movement and a lovely texture to quilts, making them a great choice in any style.
4. Matrix Maze
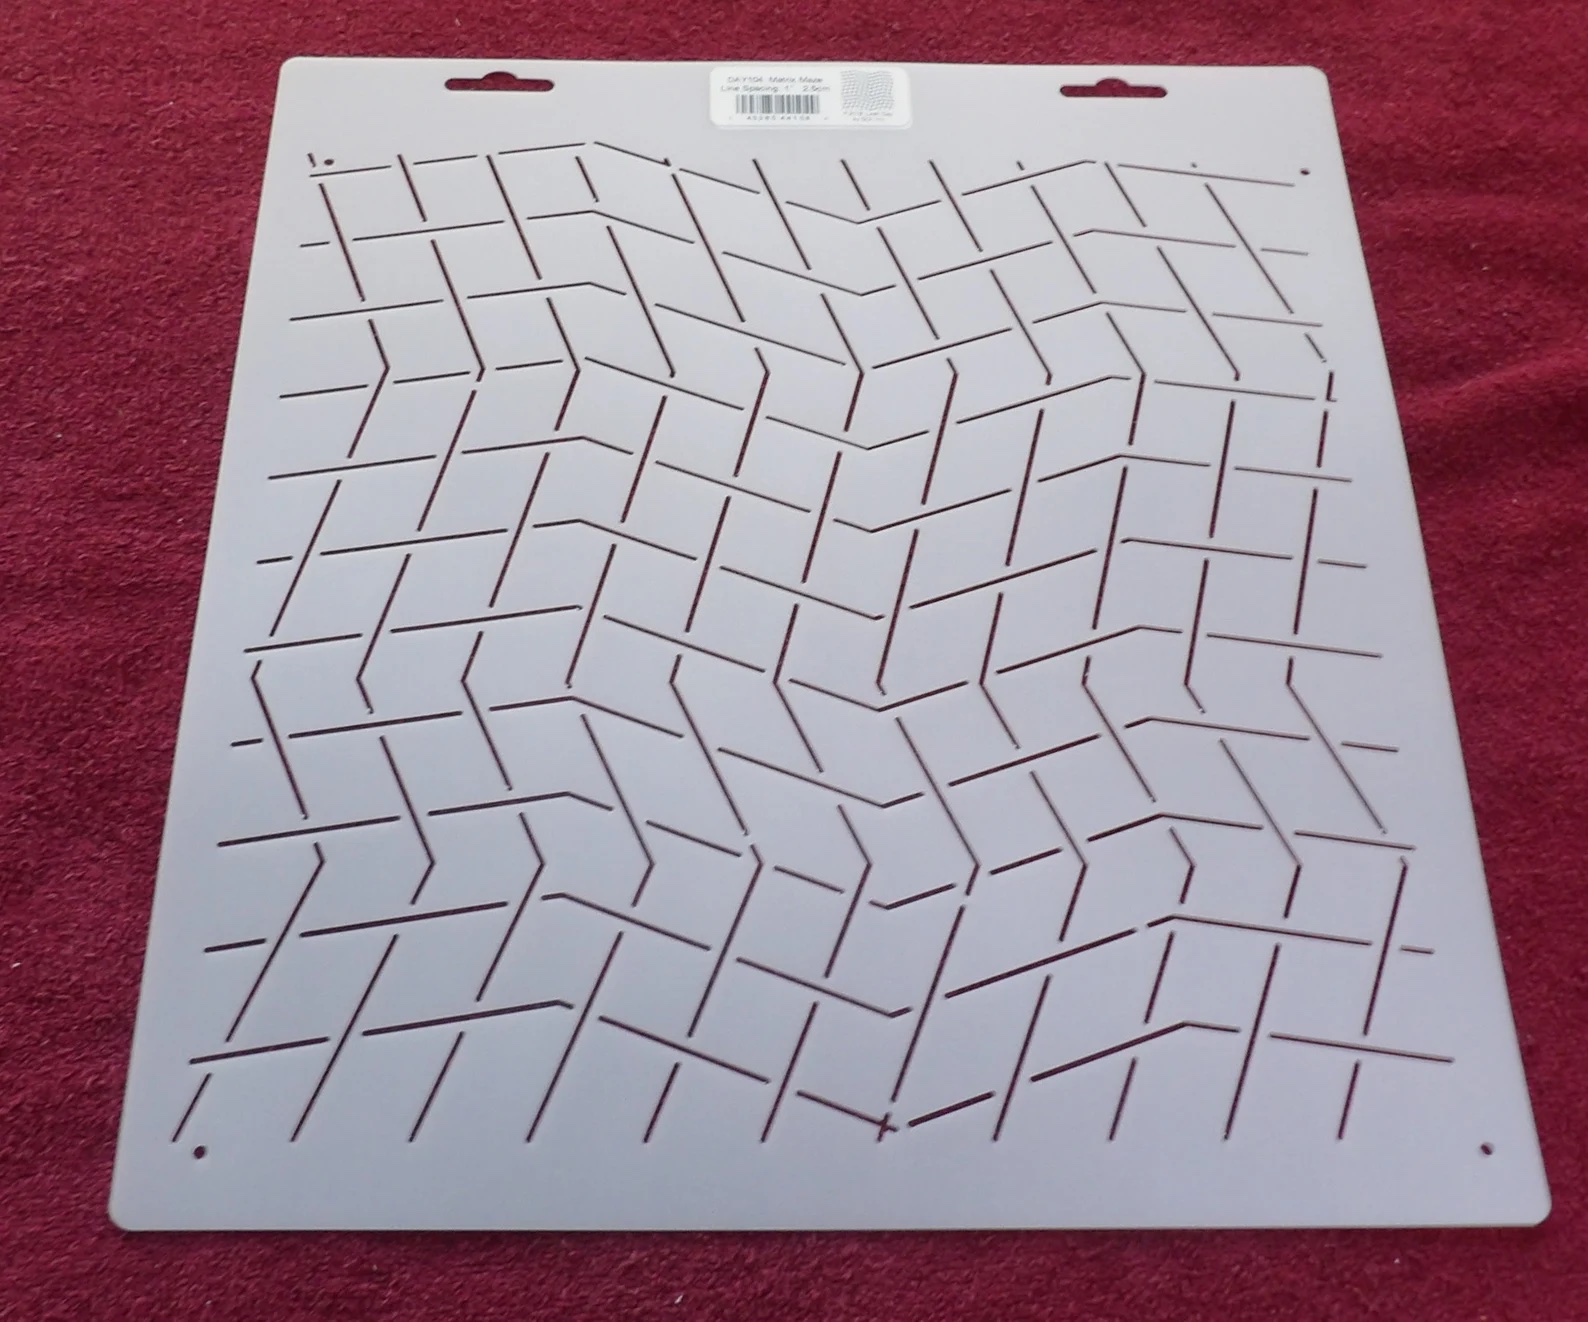
Creating this design free-hand would be difficult even for an accomplished quilter. However, with this stencil, you can easily create this design with your walking foot. The stencil measures 13” x 12” and is made of flexible Mylar plastic.
This plastic is easy to clean and store. Just don’t let it get bent while stored. This design looks futuristic and amazing on a contemporary/modern quilt.
5. ½” Curving Lines
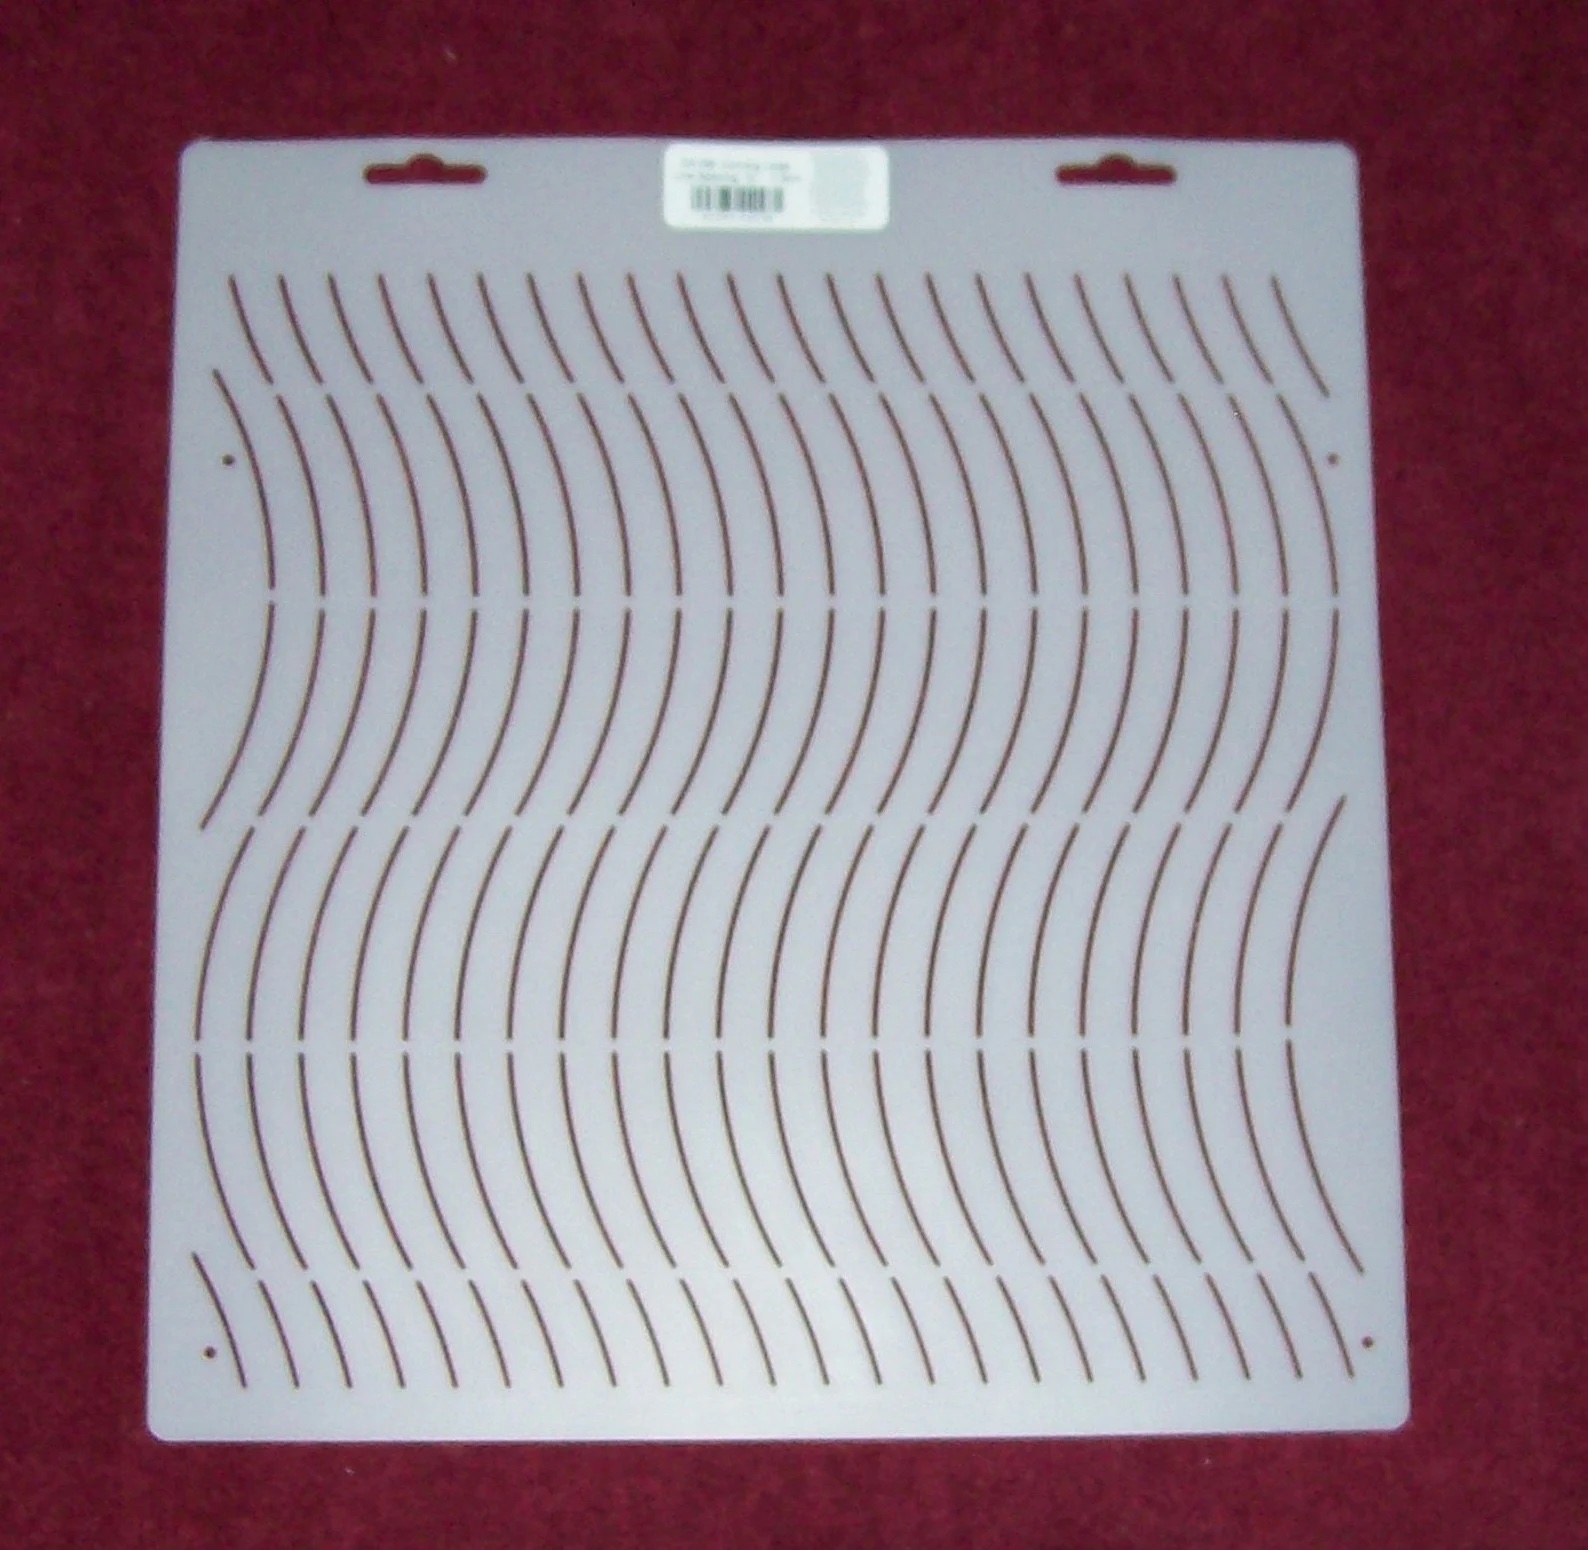
You can use this curvy line design in many applications. You could use this on a border, for an all-over design, block filler, or even a combo of a few options.
The lines are ½” apart, which means this design will give your quilt a plush texture that will soften after each wash. The stencil is made in the USA of Mylar plastic, just like the rest of the stencils in this collection.
6. Modern Twist

How cute is this curly Q design? This stencil will look best if you use it as an all-over design on a quilt. I would not recommend trying to use a walking foot with this design. You should use a free motion quilting (FMQ) foot to follow this design with your needle.
Also, you should make a practice quilt sandwich and practice the movements to create these twists using FMQ techniques. With some practice, you can do it!
7. Straight-Line Template Set
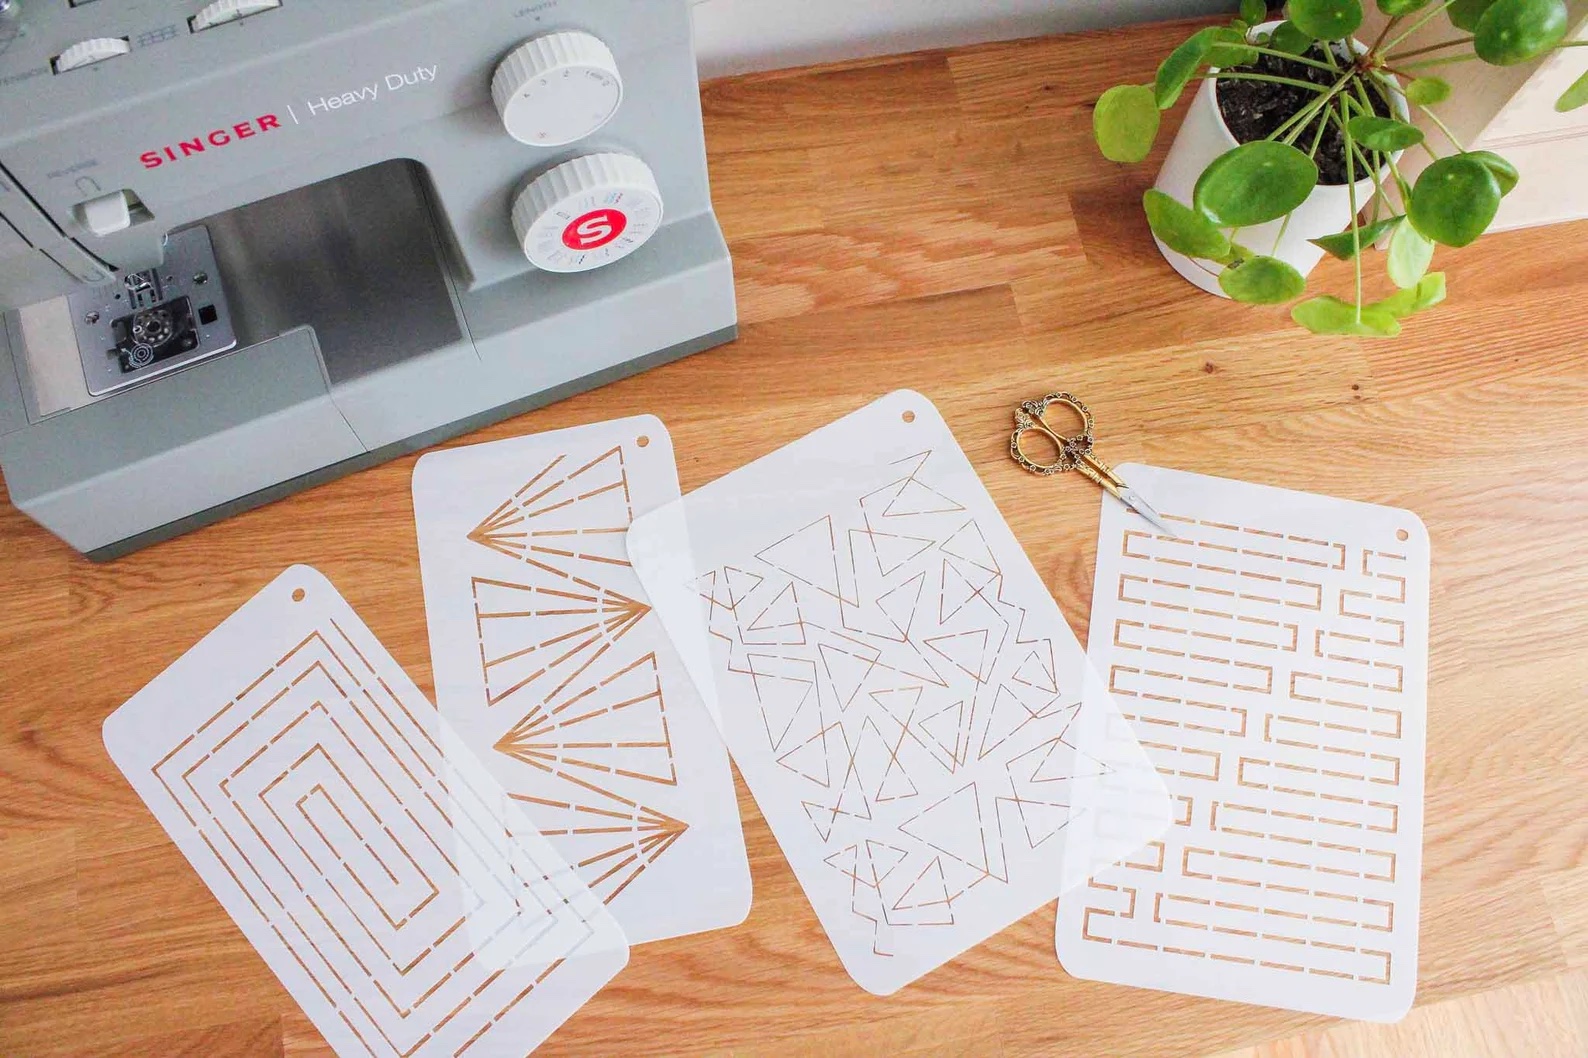
Here is a fantastic set of four straight-line quilting grid stencils. You can use these on separate quilt projects or try to mix and match them to make a unique quilting design. The designs are versatile, and you can use them for all-over quilting, block fillers, or borders.
These are made in the USA, and you can use them repeatedly. The designer also suggests you can to practice FMQ movements.
8. Honeycomb
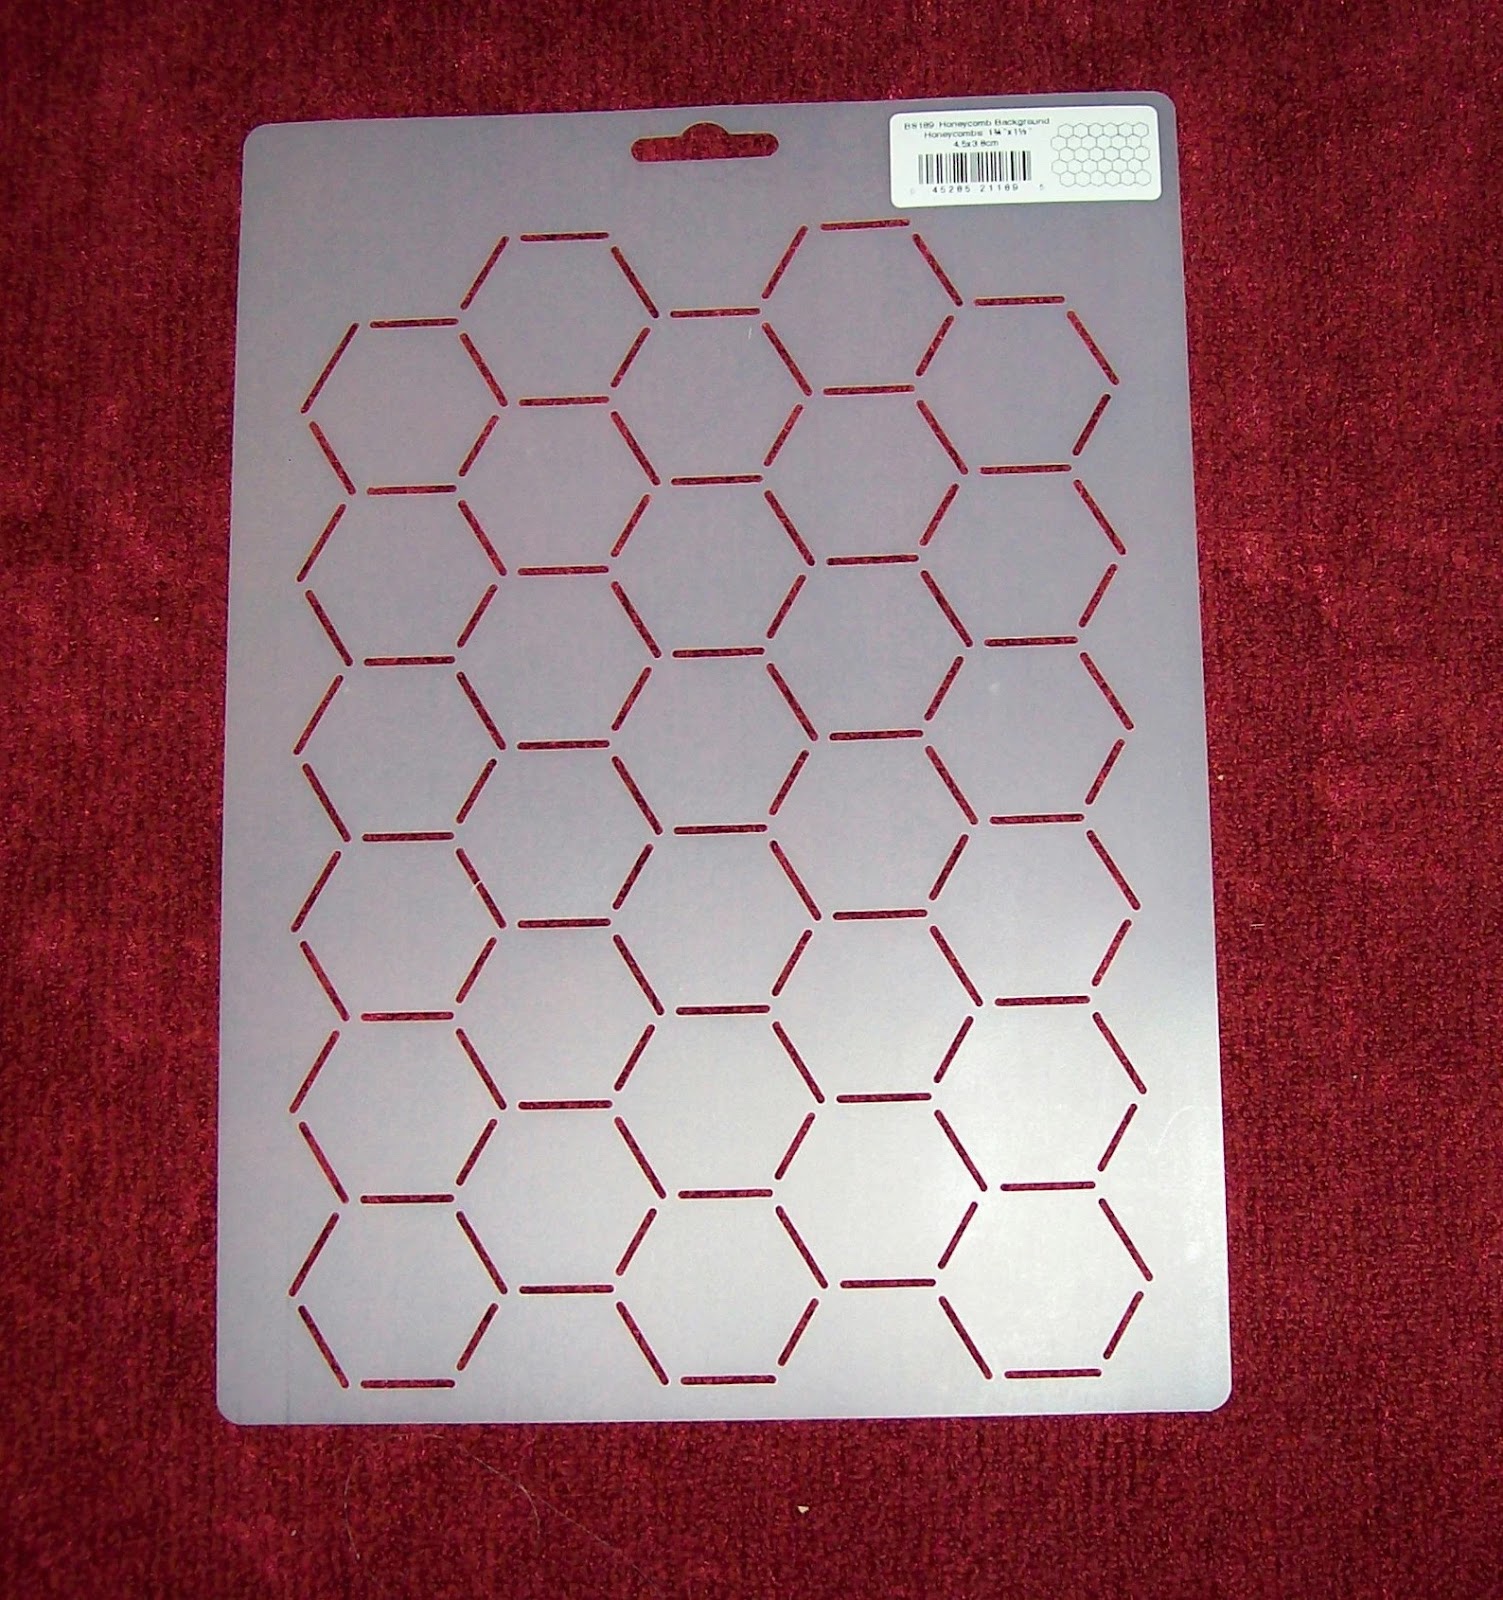
The hexagon is a great geometric shape that has gained popularity in modern quilting, so of course, this quilting grid had to make the list. This beautiful honeycomb motif will look gorgeous as an all-over design or filler.
It could double as a chicken wire design. Each hexagon measures 1 ¾” x 1 ½”, and the stencil is Mylar in the USA. Kids would love this design on their quilts since it’s visually beautiful and gives the quilt a fun texture.
9. Square Spiral

This square spiral is a fun design because it looks like a labyrinth. Each line is ½” from another and creates a beautiful square spiral. This would look cool in a single block or as an all-over design, don’t you think? The stencil measures 12” square, so it is ideal for a 12” quilt block. Y
ou can use this stencil (or any of the grid stencils in this compilation) with regular domestic sewing machines, longarm machines, and hand quilting. This design would look awesome using color-variable thread or metallic thread.
Final Thoughts
We hope this group of grid quilting ideas has inspired you to try a grid stencil on your next quilting project. I’ve used several different stencils; they’re fun to work with and help you make gorgeous designs with little effort.