
When you are setting up your sewing machine for quilting, there are several steps you need to take, from filling a bobbin to threading the needle.
One of the steps that some might overlook is choosing the correct stitch length.
Most sewing machines are set to a general stitch length of “3”, but is that the correct length for making a quilt?
Let’s discuss this topic and review some valuable information about quilting stitch length.
What Is Stitch Length for Quilting?
If you’re staring blankly at the screen wondering, “what even is stitch length, and what does it have to do with quilting?” you’re in the right place. Stitch length refers to the length of each stitch your sewing machine makes.
Sewing machine stitches are measured in millimeters; for example, if you have your sewing set at “3,” each stitch will measure 3mm.
There are various reasons you want to switch the length of your stitches for different steps of the quilt-making process.
Here is a list of the areas you would need to adjust the stitch length. Later in the post, we’ll review why stitch length is essential for each process and the recommended length for each.
- Traditional Block Piecing
- Foundation Paper Piecing
- Basting
- Quilting with a Walking Foot
- Free Motion Quilting
- Binding
Everything You Need To Know About Stitch Length For Quilting
Now that we know what stitch length is let’s discuss how to set your stitch length, the importance of stitch length, and the recommended quilt stitch length for the different steps of quilt-making.
This guide will show you precisely what to set your sewing machine at, no matter what step you are working on.
How To Switch the Stitch Length on a Sewing Machine
The dial to change the stitch length will be on the front or top of your sewing machine. The dial numbers will range from “0” to “4-6,” depending on the sewing machine. Most domestic sewing machines go up to 4mm stitches.
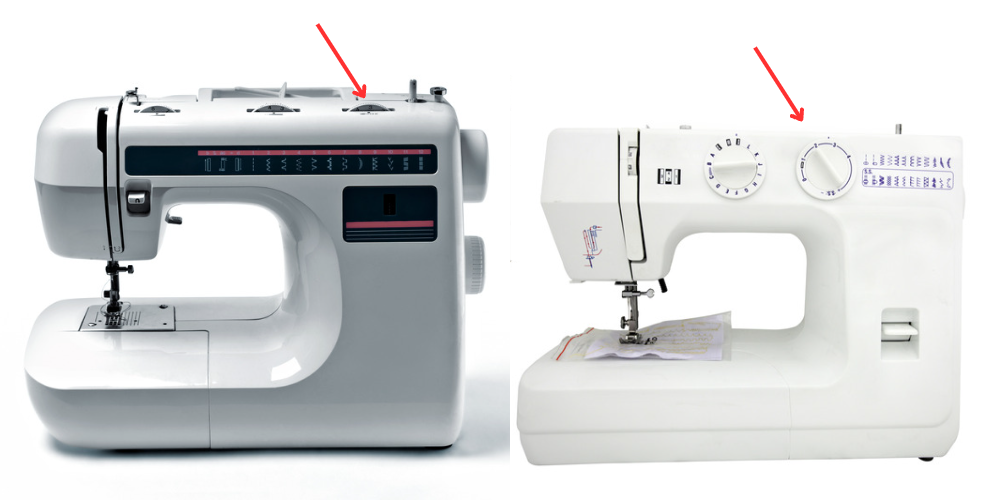
Turn the dial to your desired millimeter length to change the stitch length. Turning the dial activates a mechanism inside the machine to tell the feed dogs how much fabric to pull through the machine per stitch. So the feed dog determines the stitch length, not the needle. Pretty cool, right?
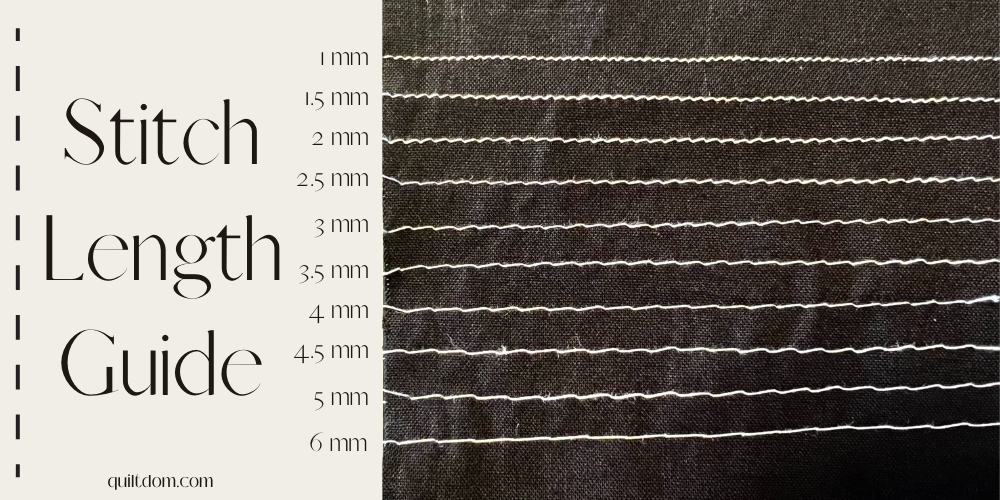
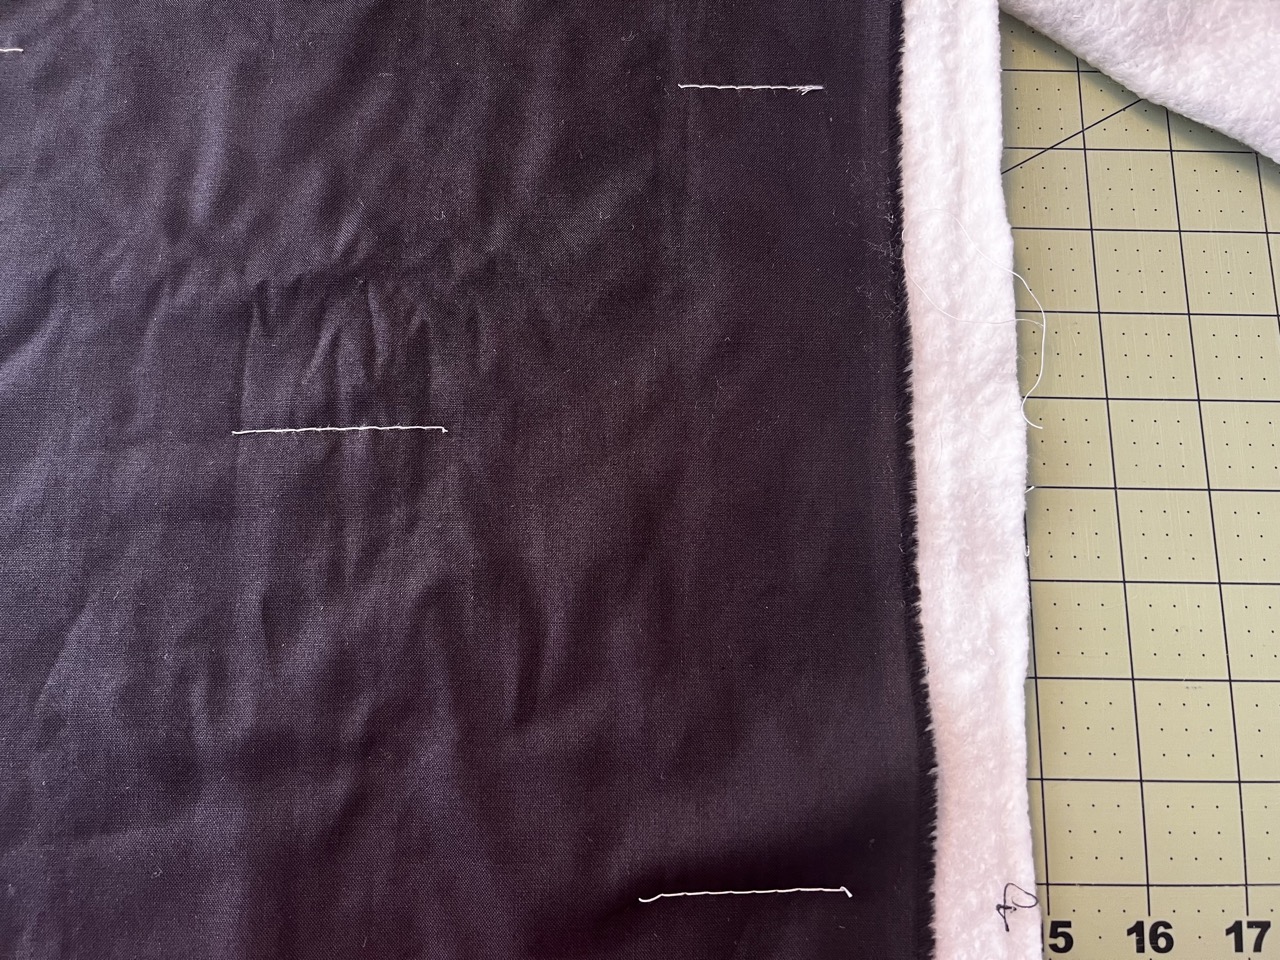
Remember, the higher the number, the longer the stitches will be. Here is an example piece of fabric showing the different stitch lengths from my machine.
What Should I Set My Stitch Length To?
Now let’s get into the nitty-gritty of the correct stitch length depending on what you are doing. Not only will you learn why stitch length is so important, but you’ll also learn how to figure out the ideal length for your sewing machine.
1. Traditional Block Piecing
You may think that if you’ve sewn two pieces of fabric together, that is good enough, and you don’t have to worry. However, there are a couple of reasons why stitch length is significant while sewing your block pieces together.
- If the stitch length is too long, the blocks will look messy and could unravel over time.
- If it is too short, removing the stitches will be challenging if you need to, and the seam won’t have enough “give” to it, which could end up with ripped fabric at the seams.
Recommended stitch length: 2.5-3.5mm
Between 2.5 and 3.5 is the sweet spot for block piecing. You should play around with the stitch length on your sewing machine to find the correct length you like best and then note that length for future projects.
I like to have my stitch length at 3mm, but you may like it a little shorter or longer, depending on your machine’s thread tension and personal preference.
2. Foundation Paper Piecing
Foundation paper piecing (FPP) is an interesting block piecing method where you use paper as a foundation piece to create intricate quilt blocks you usually wouldn’t be able to make with small and odd-shaped pieces.
When you sew the pieces together, you also sew through the paper. Sewing through the paper creates a perforation that you can use to tear the paper off after the block is finished.
Recommended stitch length: 2-2.5mm
To ensure the paper is perforated enough to rip easily, I recommend using a small stitch between 2 and 2.5mm. I wouldn’t go any shorter than 2mm because that will put too much stress on the seam and will have minimal stretch, which isn’t what you want on a quilt.
You can also use a longer stitch up to 3.5mm, but know that the paper will be much more difficult to remove from the finished block. Always be careful when removing the paper, no matter what the stitch length is, so you don’t accidentally break a stitch.
More Related Articles
Your Simple Guide To Quilt Sizes
The 23 Best Quilting Blogs On The Web For 2023
13 Sewing Books Every Beginning Quilter And Sewist Must Have In Their Library
3. Basting
Basting can be used for a wide variety of applications, but it is most commonly used in quilting to baste the layers of a quilt together for quilting.
These stitches are temporary, so you do not need to backstitch them to hold them in place. Once you’ve completed your quilting, you can remove the basting stitches.
Basting stitches should be placed every 8” or so and only need to be about a 2” string of stitches.
Recommended stitch length: 4mm-6mm
Basically, you should make the stitch length as long as possible on your sewing machine. So if your machine goes up to 5mm, set it to “5.” If it only goes to 4mm, set it to “4.”
You can also use stitch basting for applique pieces if you’d prefer not to use glue or fusible interfacing. Simply do a few stitches in the center of the applique piece, then remove them once the edges are stitched down by hand or machine.
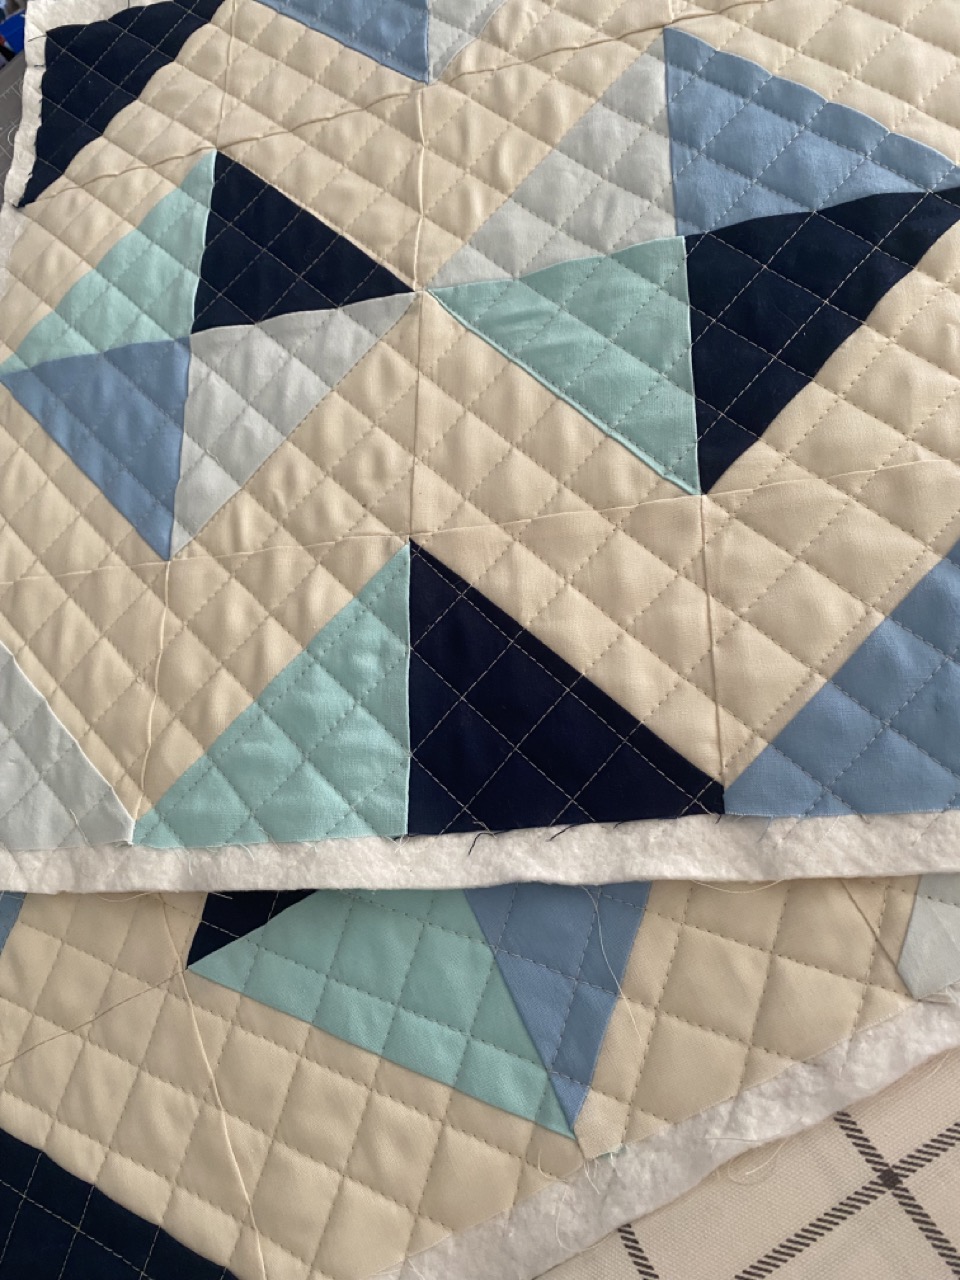
4. Quilting with a Walking Foot
Straightline quilting is quite popular in modern quilting circles, and one of the best tools you can use to create perfectly straight lines is a walking foot. But “what is the stitch length for walking foot quilting?” you may ask. It can be quite a range depending on the batting you use and your preferences.
Recommended stitch length: 2.5mm-4mm
First, first things first, I would only recommend using a 4mm stitch length for quilting if you are using a walking foot and are also using a high loft batting such as natural wool. It would not work well if you used that long of a stitch with a low loft batting.
I recommend using a scrap piece of your preferred batting and making a small quilt sandwich to figure out which stitch length works best for your sewing machine and note it for future projects. I found that 3mm is the best stitch length for quilting with a walking foot for me.
5. Free Motion Quilting
Since you need to either cover your feed dogs or lower them to do proper free motion quilting (FMQ), you also need to set your stitch length for free motion quilting to an interesting number.
Your feed dogs are no longer controlling the stitch length; you are!
Recommended stitch length: 0mm
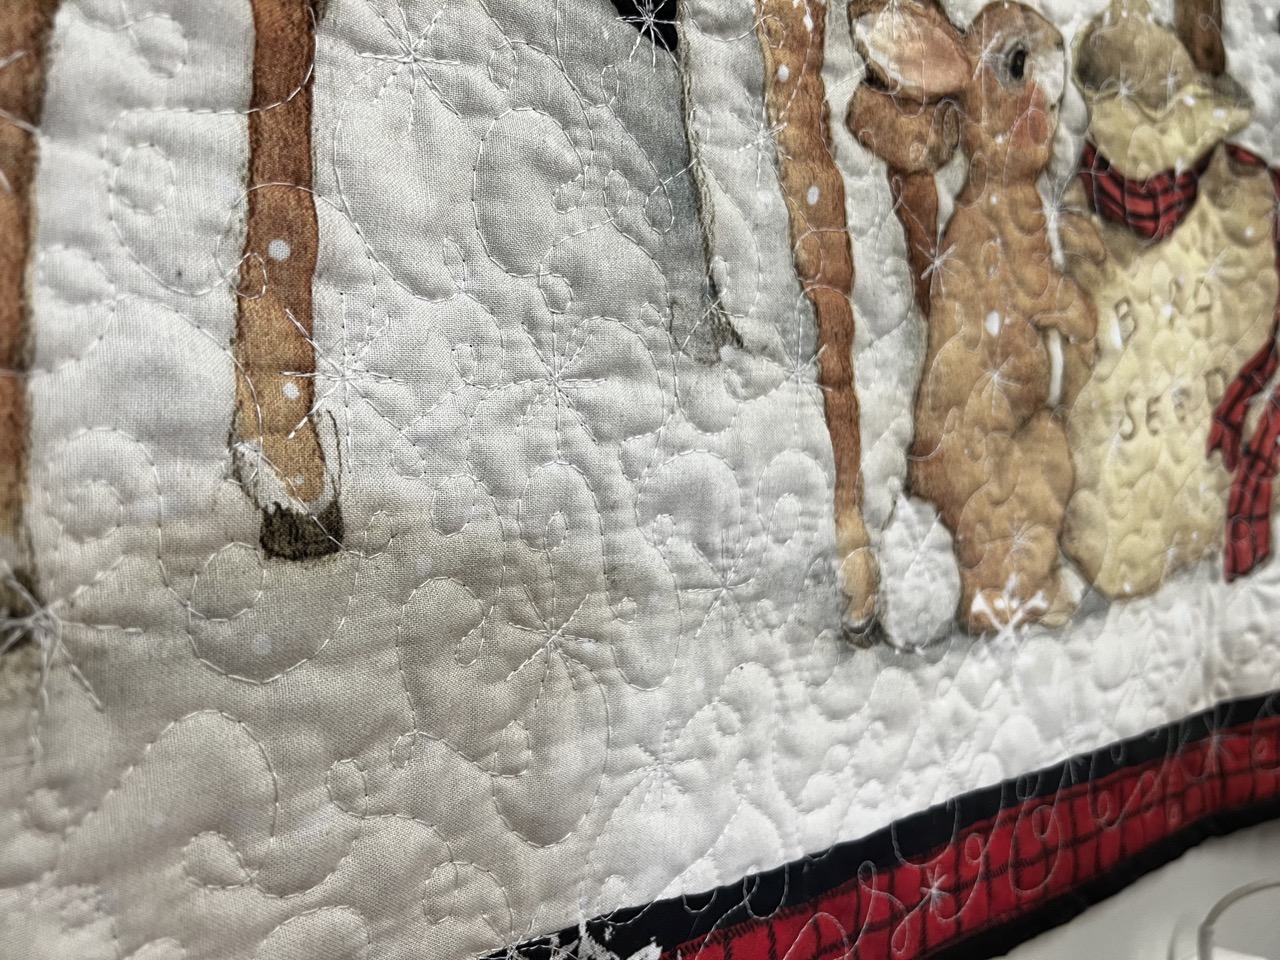
When you use FMQ, you move the fabric with your hands in all different directions, so the stitch length relies entirely on the speed of your needle and the movement of your hands.
If your stitch length seems too long, you probably move the needle too slowly and your hands too fast. On the other hand, if your stitches are too short, your needle is moving too quickly for your hands to keep up.
It will take some practice, but you will find that sweet spot where your stitches are around 2.5mm-3mm. You never want your quilting stitches to be much less than 2.5mm since that will strain the stitches when the quilt is being used, and the stitches will be more likely to break.
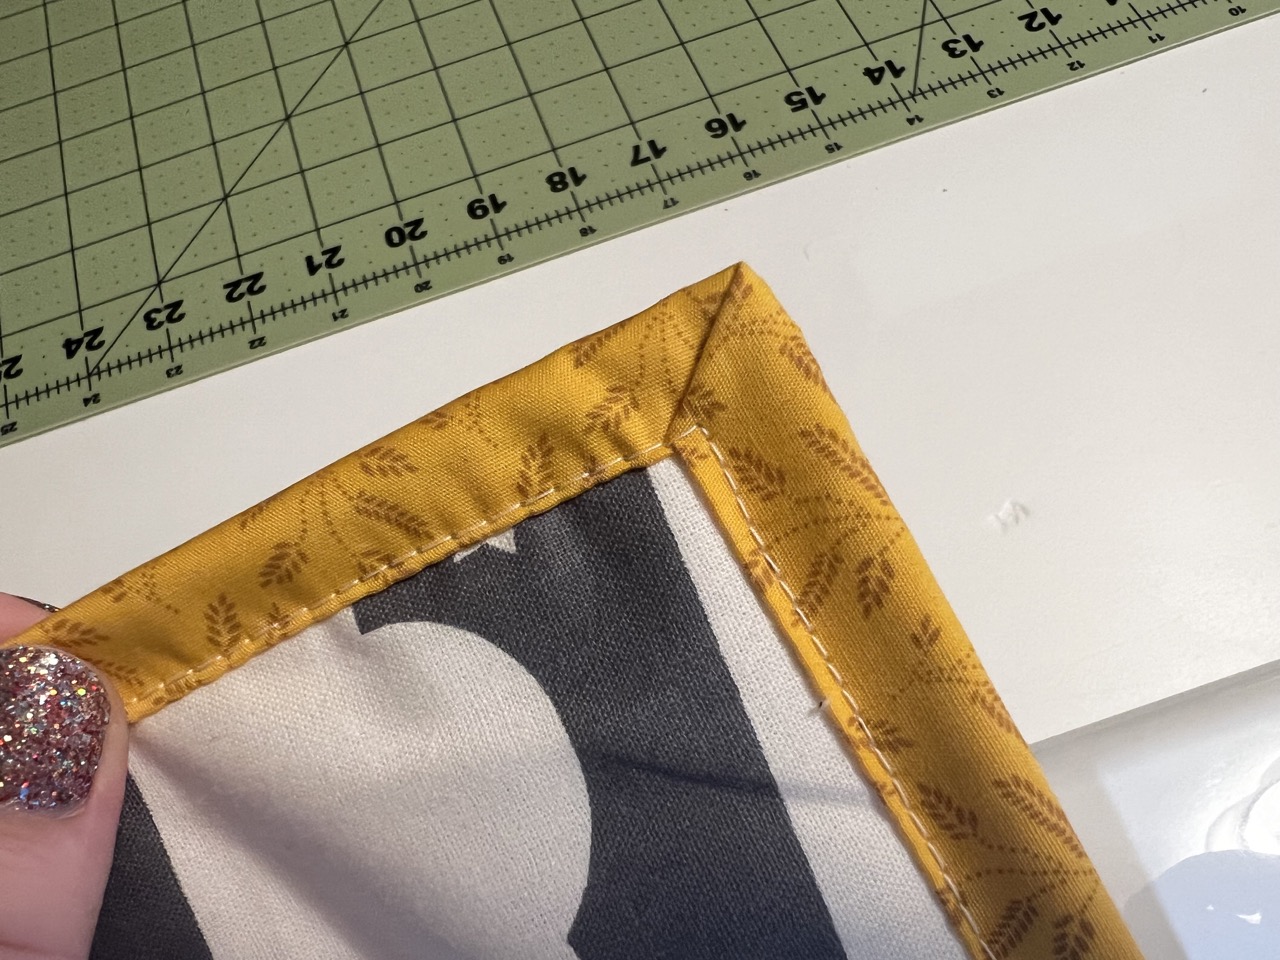
6. Binding
I don’t know about you, but I enjoy adding the binding to a quilt. The binding is critical since the part of the quilt conceals the raw edges of the quilt sandwich and finishes the project with a small, clean border around the entire quilt top.
Recommended stitch length: 2.5mm-3.5mm
Just like the other parts of making a quilt, there is a range for the stitch length for binding. You want the binding stitches to serve two purposes:
- They must look great! This is the finishing touch to the quilt design, and you want the stitches to be straight and even and add a small yet impactful detail to the binding.
- They need to hold the binding in place, so it doesn’t come undone during washings and everyday use of the quilt.
If you stay within the recommended range, your stitches will have enough room to stretch, but they won’t be too large where they’ll become loose. They also won’t be too short and could potentially snap under pressure.
I hope this post has helped you understand the importance of stitch length and figuring out what works best with your sewing machine. Stitch length may seem like a small detail, but it can make all the difference in the overall longevity and appearance of a quilt.
