
One of the most traditional and recognizable patterns for quilts is a star quilt. Star quilt blocks can have various designs but will always have those beautiful, crisp points to let you know that it is a star.
If you were to search online for a quilted star pattern, you may be bombarded with a vast selection and not know quite where to begin.
But have no fear — I’m going to break down some of the most popular star quilt patterns for you and also give you a quick star quilt tutorial.
What Is a Star Quilt?
Simply put, it is a quilt with some form of star block on the quilt top. This star can be one huge star centerpiece, or like the quilt I make in this tutorial, it can be a quilt top with rows of stars making up an entire top.
I did some digging online because I was curious who made the first star quilt pattern. But alas, it seems that it is an unknown fact. I can tell you that star quilts have been made since the early 1800s or perhaps earlier. These star patterns are still extremely popular today, which speaks to how versatile and timeless they are.
Types of Star Quilt Patterns
There are tons of different types of star quilt patterns out there, but I will share those that I think are the most popular and versatile, whether you’re a beginner or seasoned quilter.
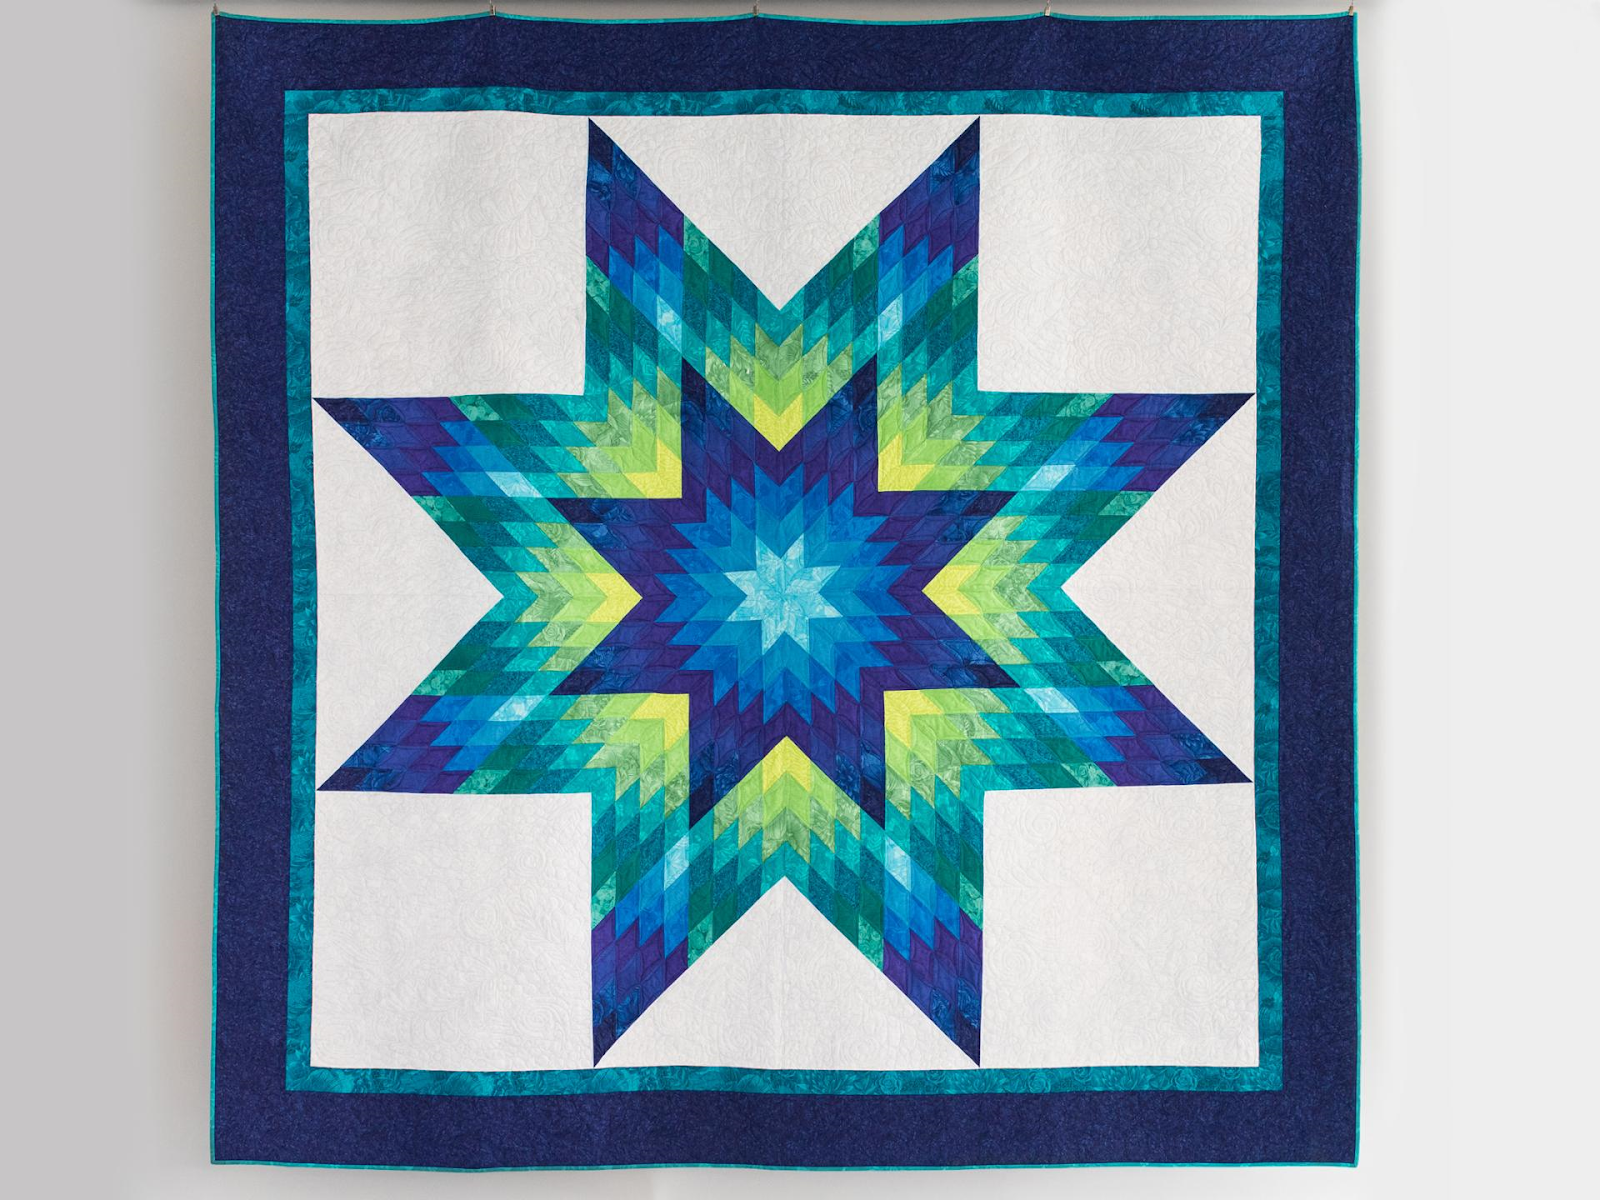
- The Lone Star: This is characterized by one sizable 8-point star as the centerpiece of the quilt.
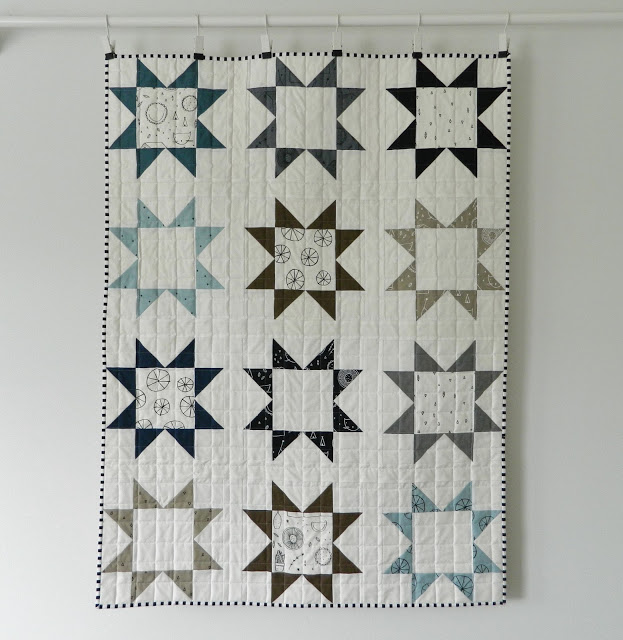
- Sawtooth Star: This is the pattern I use for the tutorial below. It is characterized by the 8 points of the star in the shape of a saw blade surrounding a center square.
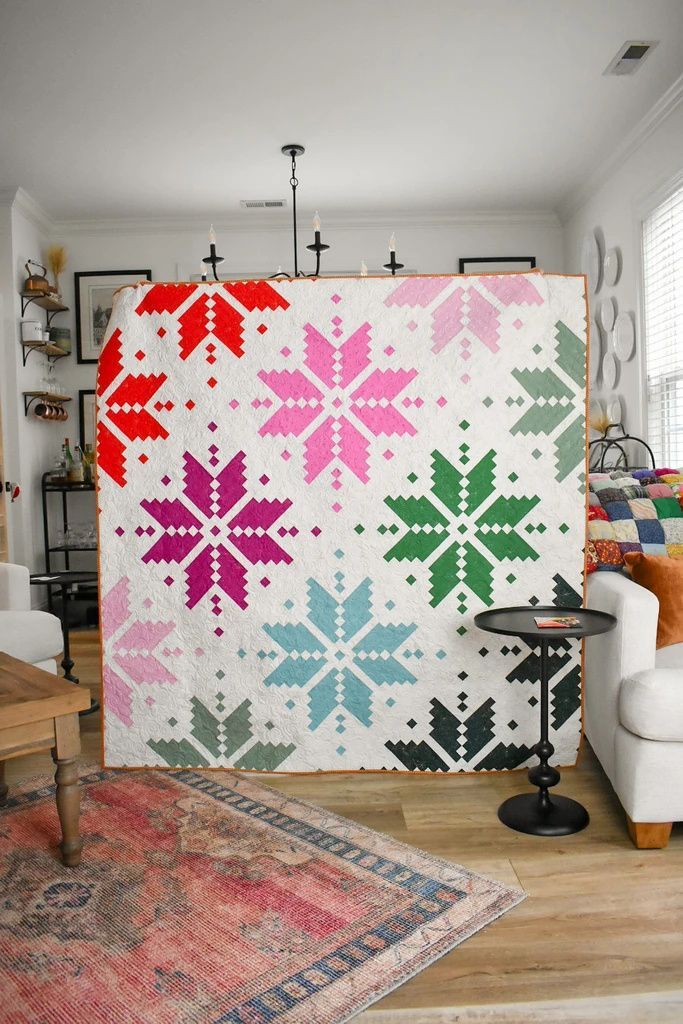
- Knitted Star: This beautiful pattern resembles knitted stars on a sweater or scarf. It’s such an excellent option for a winter quilt. If you look closely, the star is made up of strips. This pattern would be a great, jellyroll friendly project.
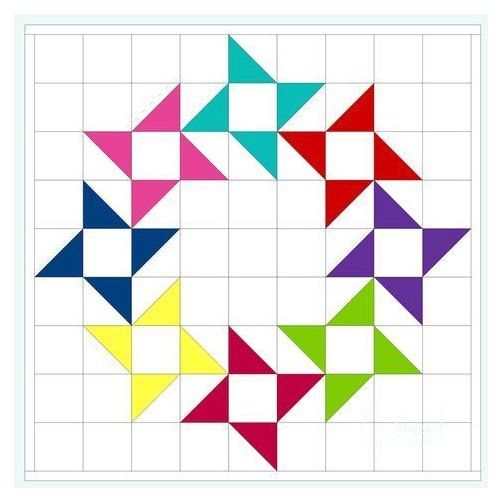
- Friendship Star: This pattern is a 4-point star that appears to be moving. It’s a great beginner pattern to try.
How to Make a Star Quilt Tutorial
When I was thinking about what type of star block I wanted to teach for this tutorial, I wanted to make sure I showed how to make a star quilt for beginners. Also, I wanted to choose something that would inspire more seasoned quilters as well.
The block that stood out in my mind was the sawtooth star block, and I’ll tell you why. This block looks a bit more complicated than it actually is, but with just a switch of colors, you can create a gorgeous quilt top in a short amount of time. You can do this project on a small or large scale easily.
For example, you could create a small centerpiece for your dining room table with just four blocks, and it would be stunning! On, if you want to finally tackle that king-sized quilt you’ve been telling yourself you would start “someday,” this would make a fabulous bed covering.
This tutorial will make 10 ½” finished blocks (10” once they are all sewn together).
Supplies Needed to Make a Star Quilt
- Fabric: The amount will depend on how large your quilt top will be and how many different fabrics you use. I used five different fabrics for my quilt top — ½ yard of the grey polka dot, black, and navy, and one yard of the light blue and medium blue.
- Rotary cutter, cutting mat, and rulers: Having these will help with time and accuracy.
- Regular sewing materials: Sewing machine, thread, marking pen (optional but recommended), iron, and ironing board.
You will need to cut the following pieces for each block:
- 1- 5 ½” square (centerpiece)
- 4- 3” squares (corners)
- 4- 5 ½” x 3” rectangles (“sawblade” background)
- 8- 3” squares (“sawblades”)
I am making a throw-sized quilt with five rows by six rows for a total of 30 blocks for my quilt top. I will also show two different variations of the block and how to do both in this tutorial. The final size, including a 2” border, will be 54”x64”.
Block #1
In this first block, I will use three different fabrics: black, light blue, and medium blue.
Step 1: Sew the “flying geese” blocks.
The first block I’ll create is called a flying geese block. It’s comprised of three pieces, which I have named the “sawblades” and the “sawblades” background.
First, take your marking pen and draw a line diagonally down both squares. This will be the line you stitch on.

Next, line up your square with one half of your rectangle, matching the line you drew with the top center of your rectangle and the opposite corner. Stitch down the line. Trim a ¼” seam allowance. Your trim will be a little triangle from both fabrics.

Now press your seam toward the square.

Mirror the image and repeat these steps for the second half of the flying geese block.

Repeat to create three more matching blocks.
Step 2: Assemble your block.
I like to assemble my blocks in mini vertical rows first. Take two of your corner pieces and one of your flying geese blocks. Sew a corner onto both 3” sides. Press both seams towards the corner pieces.

Repeat with the other two corner pieces and one flying geese block.
Next, take your centerpiece and your last two flying geese blocks and sew them together. Make sure you are sewing the side of the flying geese blocks with the sawblades pointing out. Press your seams towards the centerpiece.

Sew your three mini rows together, being sure to line up your seams of the sawblades and the centerpiece. Press your block.

That is the first variation complete!
Block #2
In this second block, I use four different fabrics: navy blue, grey polka dot, light blue, and medium blue. As you can see in the picture below, adding another fabric and varying the colors a bit gives this block a completely different feel. You will follow the same instructions from block #1 to create this block.

Step 3: Sew your blocks into rows.
When sewing your blocks into rows, try your best to line up the points of the sawblades on the two blocks you are sewing together. This really makes a difference in the overall look of your quilt.
Since I am using two different blocks, I will place them every other block, like a checkerboard.
Once you sew your rows, go ahead and press those seams either open or all pointing in the same direction so that when you quilt your quilt sandwich, all the seams lay flat.

Step 4: Sew your rows together.
Just like in Step 3, do your best to line up those points and press your seams.

Step 5: Add any borders you want to incorporate.
I like to add borders to my quilts, even if it is a narrow border. It gives a more finished look and helps with squaring up my quilt later when I’m ready to bind it. I used a 2” black border for this quilt, but you can use whatever size or style border you prefer.

Step 6: Finish up your quilt.
Now that you have completed your beautiful quilt top, it’s ready for quilting. Create your “quilt sandwich” with the batting and backing of your choice. Quilt as desired and bind.
Isn’t this sawtooth star block so fun? I love how fabric selection can switch it up and make it look so different, and yet they go so well together. You could add even more interest by using small blocks to create that centerpiece block. Have fun with it!
I hope this tutorial has made you feel more comfortable playing around with the sawtooth block or any star block. The sky’s the limit with these star blocks!
More Related Articles:
8 Of The Best Online Quilting Classes
A Simple Guide To Squaring Up A Quilt
How To Make a Baby Clothes Quilt: A Step-By-Step Tutorial


About the author: Miriam Ronne is a lover of all things quilting and sewing. She is a self-taught quilter and is constantly learning and broadening her skill set to create one-of-a-kind quilts! When she's not behind her sewing machine you can find her playing with her fur babies or trying her hand at other crafty things.