How many parents have a plastic bin or bag stuffed full of their little one’s baby clothes you just couldn’t seem to part with?
It’s safe to say, most, if not all, parents have a stash of tiny clothes, but what good are those clothes if they just sit in a closet for years without even being seen or worn?
We have an excellent idea for those sweet little treasures — make your very own custom baby clothes quilt!
I know, it’s painful to think of cutting them up, but trust me, the end result is SO worth the slight heart panic you feel when you first start cutting into them.
- What is a Baby Clothes Quilt?
- How Many Baby Clothes Do I Need for a Quilt?
- What Size Squares Should I Use for a Baby Quilt?
- Supplies You Will Need to Make a Baby Clothes Quilt
- How To Make a Quilt Out of Baby Clothes
- Step 1: Choose a quilt design and the clothing items you would like to use.
- Step 2: Prepare your clothing items for ironing on the interfacing.
- Step 3: Cut out all your pieces from your interfacing.
- Step 4: Ironing the Interfacing onto your fabric.
- Step 5: Cut out your pieces.
- Step 6: Sew your pieces into blocks.
- Step 7: Finish your quilt and enjoy!
- 9 Baby Clothes Quilts to Inspire You
- Ready to make your own baby clothes quilt?
What is a Baby Clothes Quilt?
A baby clothes quilt is merely making a quilt out of baby clothes. It is so much more than that, though. It’s something you can display and see every day that’s full of sweet memories of your little one and their first months of life.
If you have ever made a t-shirt quilt, this should be a reasonably similar project. Yes, working with stretchy clothing items can be tricky, but I will give you some tips and tricks to use and some adorable baby clothes quilt ideas.

A quick search online for “baby clothes quilt pattern” will bring up several fun ideas and inspiration for your project. You can also use pretty much any regular quilt pattern; just try not to pick one that has a lot of little tiny pieces for your first one, as those can be tricky. For my example, I’m using a regular quilt pattern, creating different size houses for this quilt top.
How Many Baby Clothes Do I Need for a Quilt?
If you want to make a quilt from baby clothes, there are several things to consider. For example, if you are a beginner quilter or not quite as comfortable working with stretchy fabrics and interfacing, I would highly recommend choosing a straightforward quilt pattern to make your baby clothes keepsake quilt.
How many pieces of clothing you will need will depend on the quilt pattern you choose. I would suggest selecting a quilt pattern that is either charm pack or fat quarter friendly.
As a general rule, you should be able to get 6 to 8- 5” squares(charm pack size squares) and about half a fat quarter from one piece of baby clothing. The baby clothing size will play a significant role in that estimation as well, but you can use those estimates as a guide.
What Size Squares Should I Use for a Baby Quilt?
Since you will most likely work with stretchy or delicate fabrics for your custom baby clothes quilt, I suggest using squares no smaller than 4”. Any squares smaller than 4” can be tricky to work with, especially if you aren’t used to working with stabilized stretchy material.
If you want to mix and match the baby clothes with regular quilting fabric for your baby clothes blankets, a great size to go with will be 5” charm pack squares. They come in all kinds of precuts, and that is an ideal size to work with when using baby clothing.
Supplies You Will Need to Make a Baby Clothes Quilt
- Baby Clothes: Use as much as you would like in your quilt design. It’s really up to you how many items you use. You could incorporate just a few select pieces into a traditional quilt design, or you could make the entire quilt top out of clothing items. I’ve made the entire quilt top from a little boy’s baby clothes and his crib sheets for my example quilt.
- Quilt Pattern: You’ll find plenty of lovely patterns online.
- Regular Sewing Supplies: Sewing machine, thread, scissors, rotary cutter and cutting mat, and a ruler.
- Interfacing: This will make your project SO much easier. I like to use either Pellon SF101 or P44F. Both are fusible interfacings that will stabilize the stretchy fabric.
- Iron and Ironing board/mat

How To Make a Quilt Out of Baby Clothes
In the following steps, I will go through the process of using baby clothes to create a quilt for you and/or your little one. You can use these steps for the entire quilt top or just a few blocks if you would like to incorporate a few clothing items into your quilt project.
Step 1: Choose a quilt design and the clothing items you would like to use.
This is probably the most crucial step because it gives you the most control over your design, what pieces you will use, and set the entire project’s tone.
If you want to use several pieces with larger graphics on them, like t-shirts, I would suggest a more traditional “t-shirt quilt” design to have those graphics front and center of the quilt.
Figuring out what pieces you would like to use and deciding the actual quilt design is a fun way to express your creativity and make a unique time capsule gift for yourself and your child.

Step 2: Prepare your clothing items for ironing on the interfacing.
To prepare your clothing items, you will want to cut the pieces to have as much fabric to work with as possible, especially if you’re going to do larger blocks.
For shirts or dresses, cut up the seams of the shirt on both sides. Follow the seam with your scissors up to the neckband and cut so you have one large piece. Don’t cut your graphic piece out yet. This step is just the prep work.

For pants or shorts, cut the waistband entirely off. Cut the crotch seam all the way on either side of the seam. Now, cut down the inseam all the way down and open up your leg piece. The pants or shorts are ready for the next step.

Step 3: Cut out all your pieces from your interfacing.
This step is optional, but I like to cut out all my pieces from my interfacing first to lessen the amount of wasted interfacing for my projects — especially when my project (like the one I am doing now) has several different size pieces that I must cut for each block.

If you would rather skip this step and just iron on a large piece of interfacing onto your fabric and then cut out your pieces from that, just skip to Step 4.
Step 4: Ironing the Interfacing onto your fabric.
Ironing the interfacing on before you cut out your pieces from the clothing will ensure you don’t have any curled edges or warped stretching going on.
I have a couple of tips for ironing the interfacing onto the fabric to make it a bit easier and to ensure you won’t have any “whoopsy daisy” moments.
- Ensure you are always ironing the interfacing on the wrong side of the fabric (the back of the fabric). I know this seems self-explanatory, but trust me, it’s a good habit to have to check each time you’re about to iron on a new piece of interfacing. Once it’s glued on, it is tough to remove.
- If you are ironing onto graphic t-shirts, be sure to iron with the graphic facing down. I’ve made the mistake of ironing directly on the graphic, and it makes a huge mess. The graphic comes off, sticks to the iron, and is a nightmare to remove.
- Use medium heat and press firmly. Be sure the entire piece is stuck to the fabric to avoid any puckering later on.
- If you already cut the interfacing out with your pieces, make sure to place the interfacing to have your graphics centered strategically.

Step 5: Cut out your pieces.
Now you will see what all your pieces will look like once you start cutting your pieces out. If you already cut out the interfacing, you will just need to line up your ruler with the interfacing edges and cut to the appropriate size.

If you didn’t do Step 3, you will cut your pieces out the way you normally would from any other fabric. Make sure your pieces are square, and the entire back is covered in interfacing so the edges won’t curl or stretch when you go to sew your pieces together.

Step 6: Sew your pieces into blocks.
You are now ready to begin piecing your blocks together. Line up your edges and sew with a ¼” seam allowance just like you would with regular fabric.
Be sure to take it slow at first, as it will be thicker than regular quilting cotton. Give yourself and your machine a little time to get used to the thickness.
I would recommend putting a fresh needle into your sewing machine to be sure it’s sharp and ready to go through these thicker fabrics.

Make sure you are ironing your seams down as well. Ironing them will help with the bulkiness when you go to quilt your quilt sandwich.
Follow the pattern you are using and create your quilt top.
Step 7: Finish your quilt and enjoy!
Once your quilt top is complete, then you can put your quilt sandwich together and quilt, as desired, either by machine quilting, hand-quilting, or hand-tieing your quilt.
When you finish quilting, trim off any excess fabric and batting, and bind your quilt.
9 Baby Clothes Quilts to Inspire You
1. Sew Cozy Onesie Keepsake Quilt
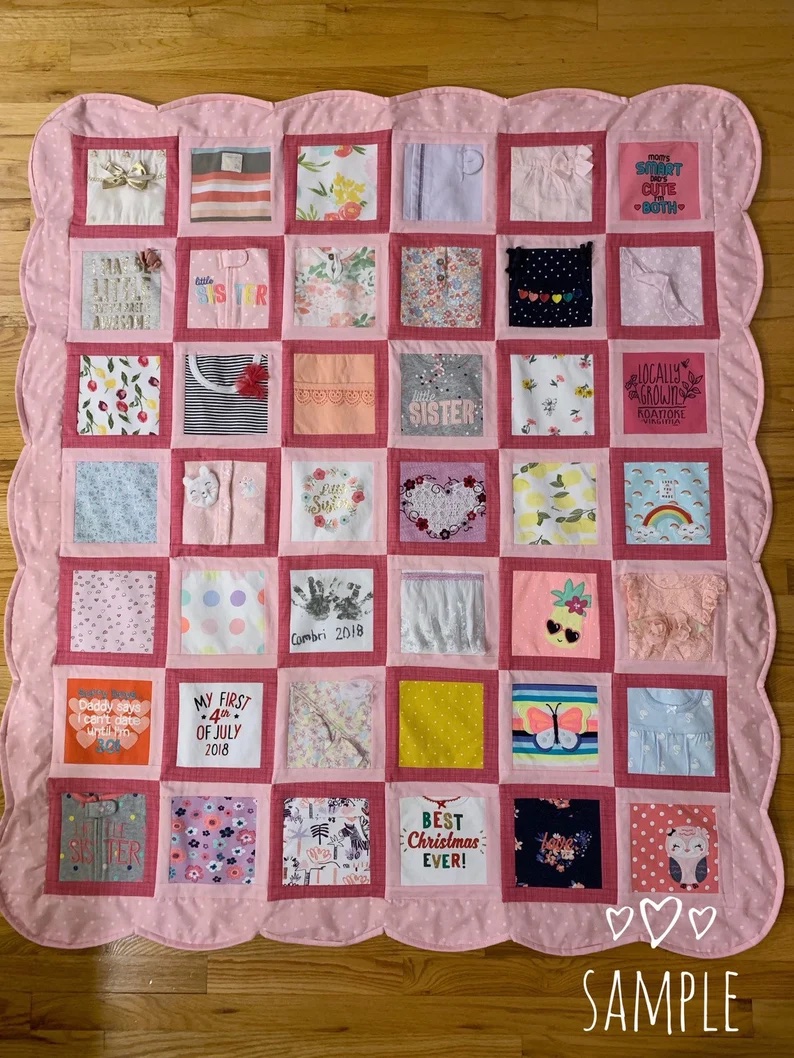
Chrissy over at Sew Cozy by Chrissy has done a fabulous job of using baby onesies to create this sweet scalloped edge baby quilt. This quilt highlights so many special memories for the child it was made for.
2. LoveKeepCreate Keepsake Quilt
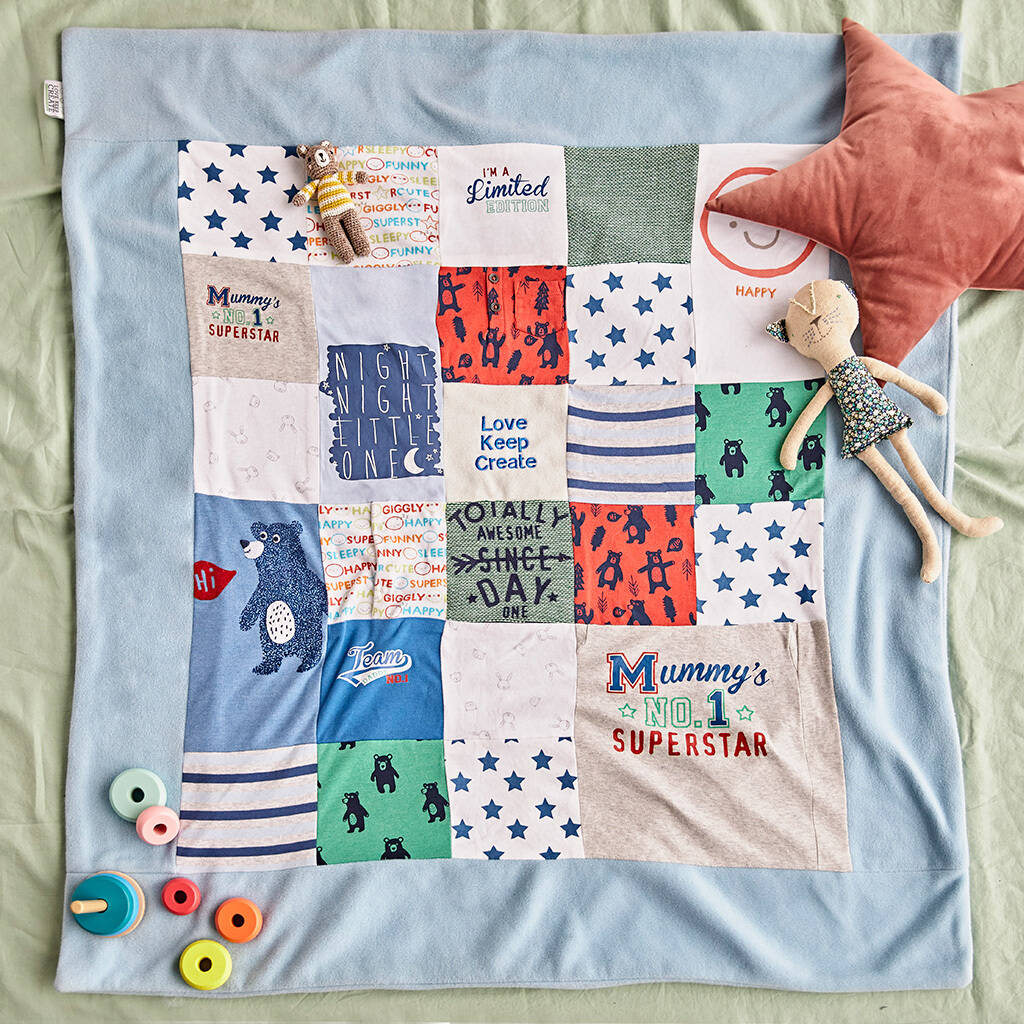
This quilt is a fantastic example of using a simple design to highlight different-sized blocks. Now all those adorable t-shirts can have a 2nd life with a precious quilt like this one.
3. Baby Clothes Heart Quilt
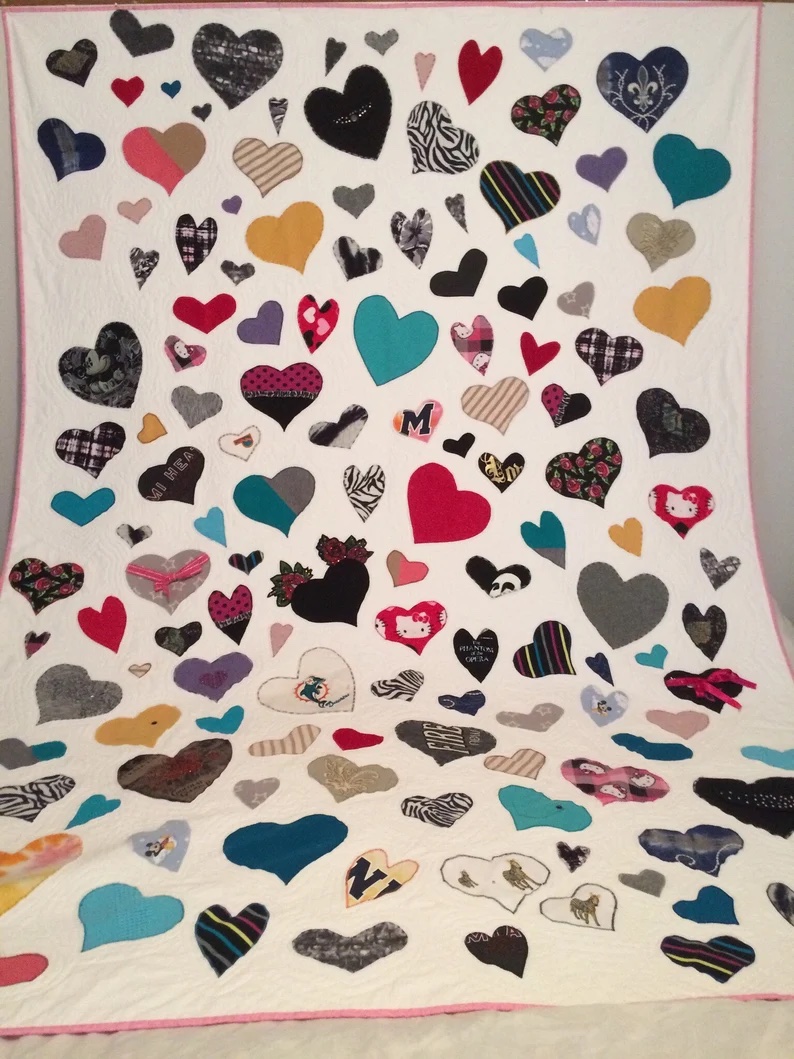
Isn’t this a fun spin on a traditional quilt? These hearts are appliqued and cut from baby clothes, making a large quilt for the child to enjoy for years.
4. My Favorite Clothes Memory Quilt

This gorgeous quilt was made using a nine patch block along with a single block and sashing. The sashing helps give the quilt top stability and frame the adorable dress tops used for this design.
5. Coconut Robot Onesie Quilt
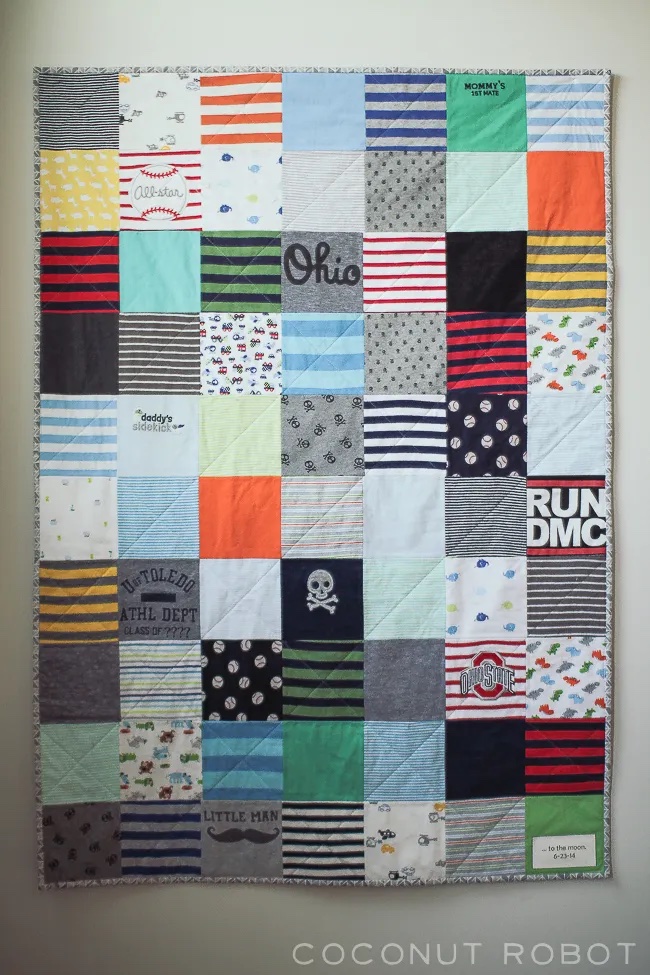
This example quilt is simple and adorable! It nine-patch is the perfect representation of a baby onesie quilt design for someone new to sewing with stretchy fabrics or new to quilting altogether. Using only one size square for the entire project makes this quilt look modern, cozy, and ready to be loved by a little one.
6. Baby Clothes Memory Quilt
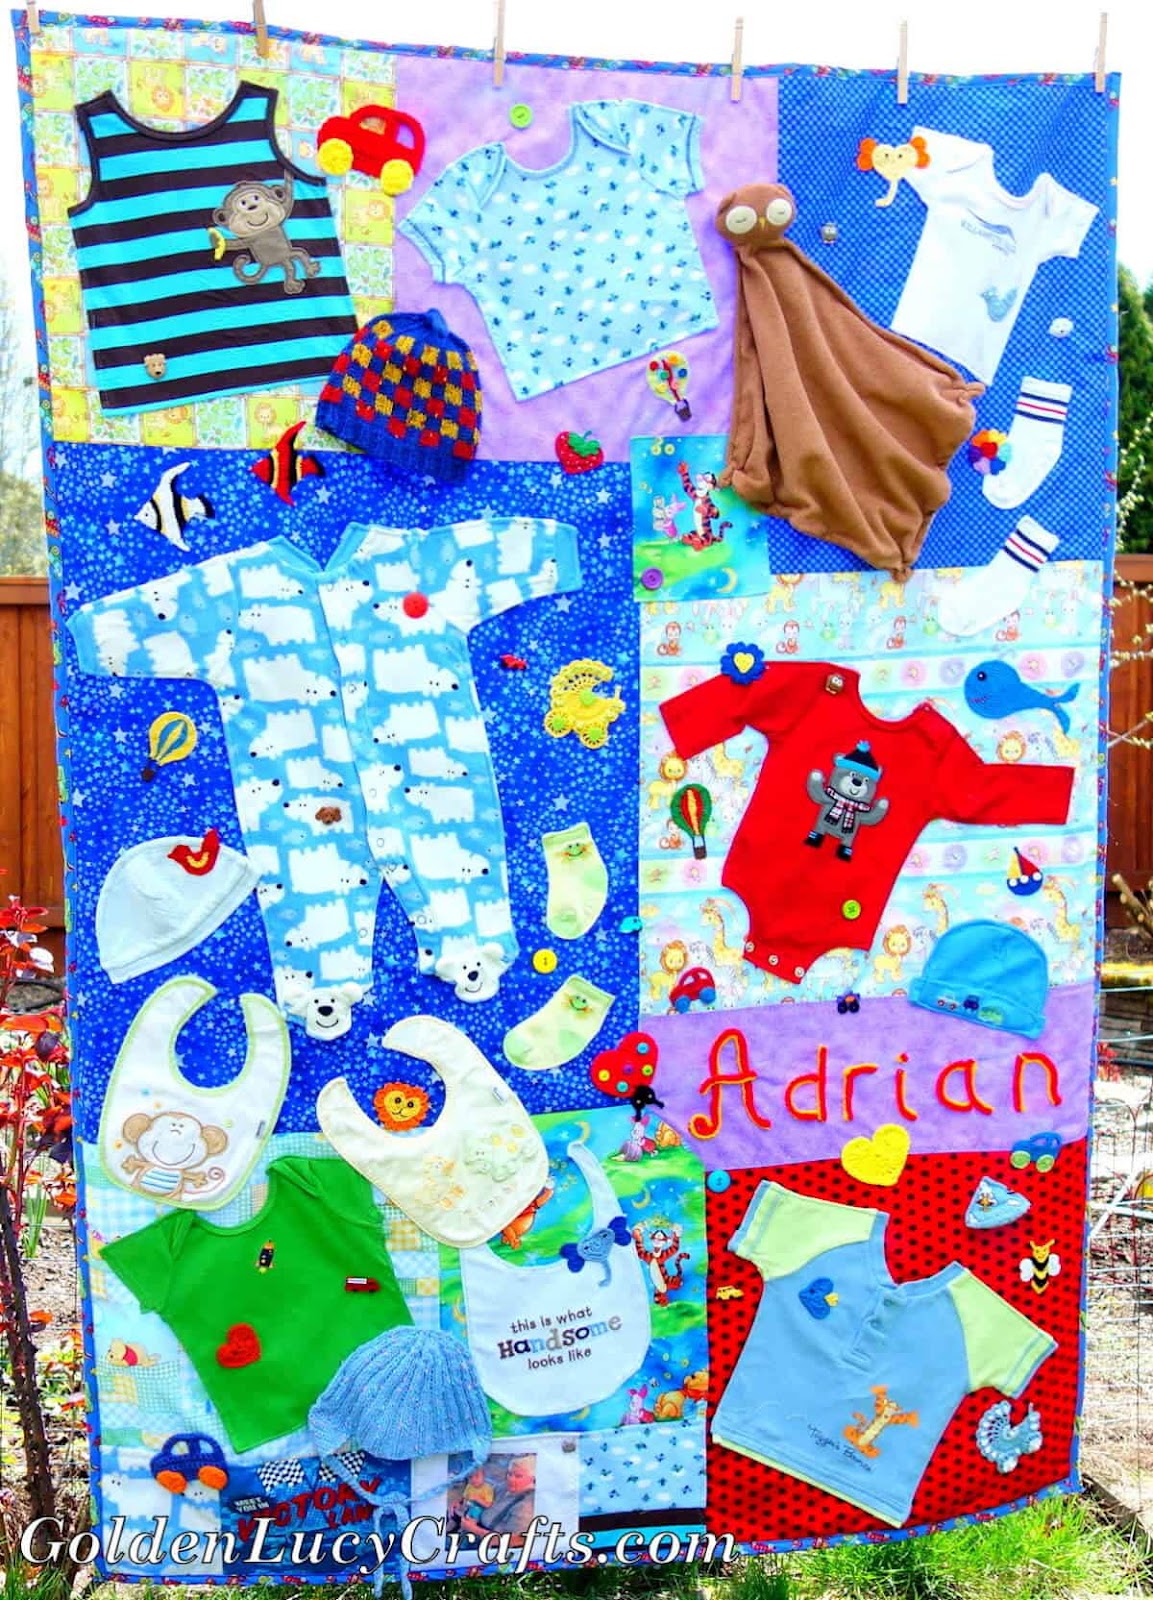
Wow! How fun is this quilt? The designer appliqued whole pieces of clothing to the quilt top to create a unique and playful design.
7. Heart + Sew Memory Quilt
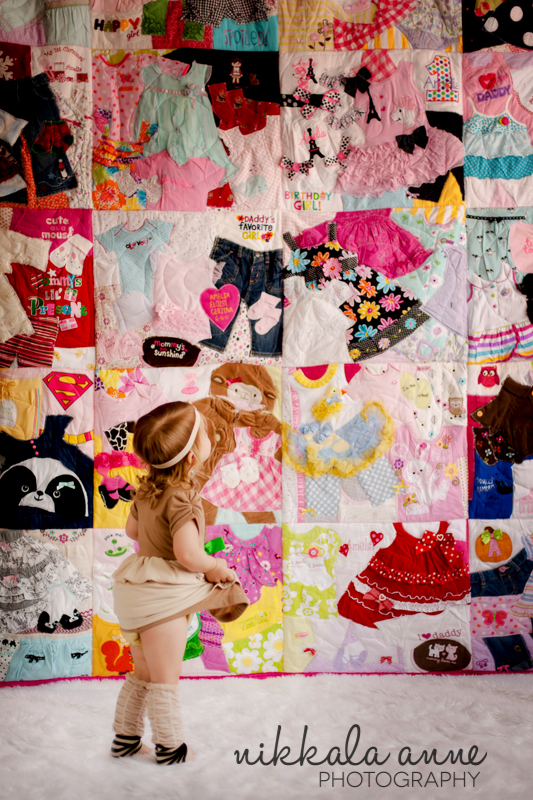
Here is another adorable example of using entire pieces of clothing to create a truly unique design. What little girl wouldn’t love to have this type of quilt?
8. Jelly Bean Quilts Baby Clothes Memory Quilt
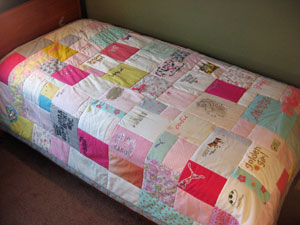
I love the combination of the different-sized blocks in this simple patchwork design. The quilt looks cozy and warm, perfect for a little one to snuggle under.
9. Clothesline Baby Clothes Quilt
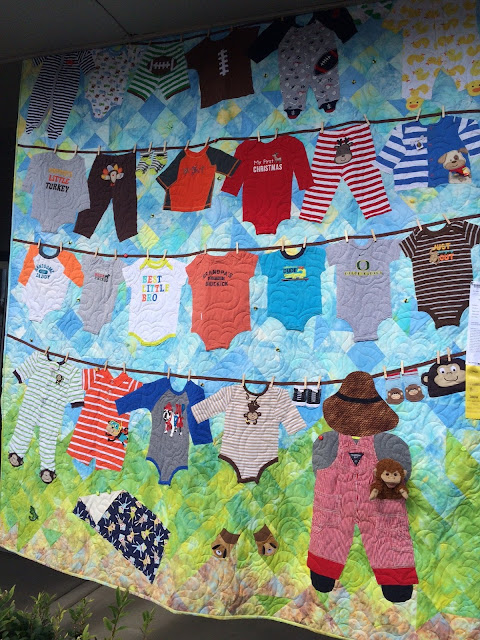
Oh my goodness, this quilt is so insanely adorable! What a genius design idea to create a “clothesline” to showcase the different clothing items.
Ready to make your own baby clothes quilt?
Have you ever made a quilt out of baby clothes? Do you plan to make one soon?
Think of how precious this project will be once you have completed your very own baby clothes quilt.
Instead of letting that bag of clothes sit unused in the corner of a closet, you can transform the items into a great conversation piece and a beautiful reminder of those sweet moments with your little one.

About the author: Miriam Ronne is a lover of all things quilting and sewing. She is a self-taught quilter and is constantly learning and broadening her skill set to create one-of-a-kind quilts! When she's not behind her sewing machine you can find her playing with her fur babies or trying her hand at other crafty things.